Category: Camera Modes

Learn program, aperture priority, shutter priority, and manual exposure modes.

  • What Does Aperture Do? A Beginner’s Guide to Exposure and Background Blur

    By Owen Ellis, CaptureView editorial pen name
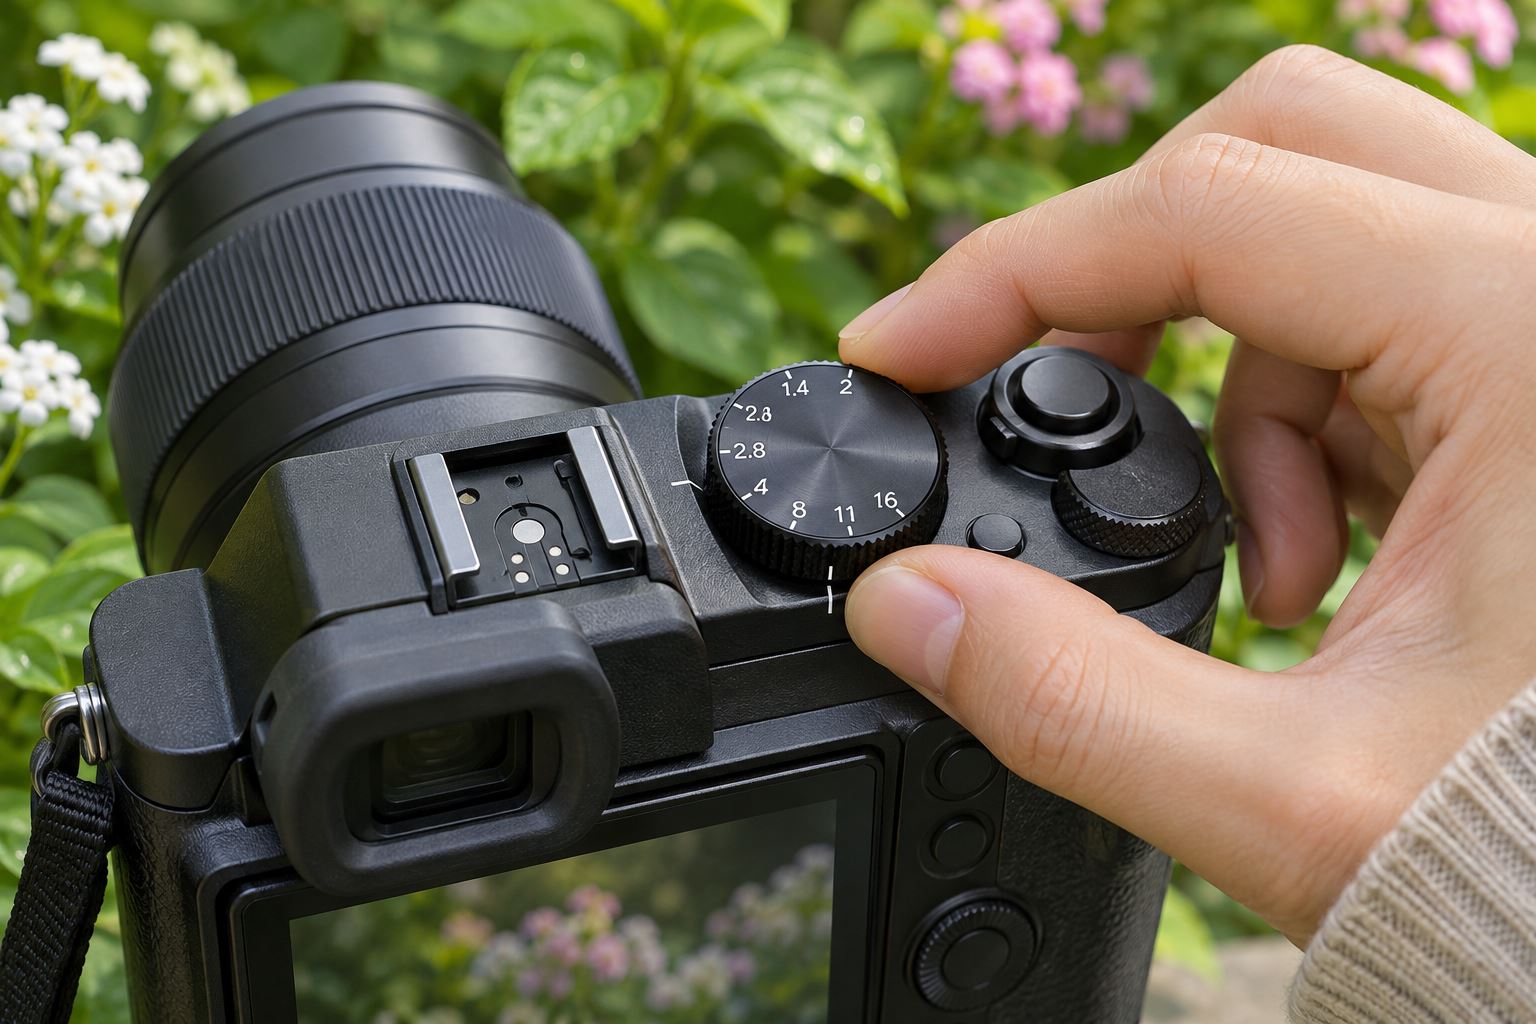

    A hand turning the aperture dial on a camera outdoors
    The aperture setting controls how much light passes through the lens and affects depth of field.

    Aperture is the opening inside a lens. It changes how much light reaches the camera sensor and how much of the scene appears in focus from front to back. Those two effects are linked, which is why aperture can feel confusing at first. A low f-number means a wide opening; a high f-number means a smaller opening.


    You do not need to memorize every setting before making a photograph. Start by deciding whether you want more background blur or more of the scene to look sharp. Then choose an aperture that fits that goal, take a test photo, and check both the subject and the exposure.


    What the f-number means


    Aperture is written as an f-number, such as f/2, f/4, f/8, or f/16. The scale runs in an unintuitive direction: f/2 is wider than f/8. At f/2, the lens opening is relatively large and lets in more light. At f/16, the opening is smaller and lets in less.


    Each full stop changes the amount of light by a factor of two. Moving from f/4 to f/5.6 halves the light. Moving from f/5.6 to f/8 halves it again. In the other direction, f/8 to f/5.6 doubles the light. Many cameras let you adjust aperture in smaller one-third-stop steps, so the numbers on the dial may not jump through the full-stop sequence.


    Why a wide aperture blurs the background


    A wide aperture can create a shallow depth of field: a narrower range in front of and behind the focus point appears acceptably sharp. That is useful for a portrait when you want attention on the eyes and less on a busy room. It does not automatically make the background disappear. The amount of blur also depends on how close you are to the subject, the distance between the subject and background, and the lens focal length.


    For a simple test, place a person or object a few feet in front of a distant background. Take one photo at the widest aperture available, then make another at f/8 without moving the camera. Compare the background, but also inspect the focused detail. If the subject is not sharp, the focus point may have landed in the wrong place or the shallow focus area may be too small.


    With a kit zoom, the widest available aperture often changes as you zoom. The camera may show a range such as f/3.5–5.6. That means the lens opens to f/3.5 at the wide end and only f/5.6 at the telephoto end. This is normal. You can still soften a background by increasing the distance between subject and background or by using the longer focal length from farther away.


    Why a smaller aperture keeps more in focus


    A smaller aperture, such as f/8 or f/11, generally increases depth of field. It can help when photographing a landscape, a group, or a tabletop scene where you want several important details to remain sharp. Focus still matters: a small aperture cannot make every distance perfectly sharp, and very small openings such as f/22 can reduce fine detail because of diffraction.


    For a landscape, f/8 is a useful starting point on many lenses. Focus on a meaningful area within the scene rather than automatically focusing at the farthest mountain. If the foreground is close and must be sharp too, make a test image and zoom in to check it. A tripod can help when the smaller aperture requires a slower shutter speed.


    Aperture changes exposure too


    Exposure is controlled by aperture, shutter speed, and ISO. If you close the aperture by one stop, the image receives half as much light unless another setting compensates. In aperture priority mode, the camera usually adjusts shutter speed for you. In manual mode, you choose the other settings yourself. Auto ISO can also raise sensitivity when the light is low.


    Watch the shutter speed when you select a small aperture indoors or at dusk. A value that is too slow can make a handheld photo blurry. If the camera drops below a comfortable speed, open the aperture, raise ISO, add light, or use support. The right choice depends on whether motion blur or noise would be more distracting in that particular picture.


    Try aperture priority as a learning tool


    Set the mode dial to A or Av, depending on the camera brand. Choose an aperture and let the camera select shutter speed. Keep ISO on Auto at first, with a reasonable upper limit if your camera allows it. This gives you room to explore depth of field without having to adjust every exposure control at once.


    Make three frames of the same still subject at the widest aperture, f/5.6, and f/8. Keep your position and focus point fixed. Review the files at the same magnification. Note how the background changes and whether the shutter speed or ISO moved. If the camera used a shutter speed too slow for handheld work, repeat the test with more light or a tripod.


    Common aperture mistakes


    • Choosing the lowest number every time: A very wide aperture can leave one eye sharp and the other soft in a close portrait. Try one stop smaller if you need more depth of field.
    • Expecting f/16 to fix missed focus: It increases the range that looks sharp, but you still need a sensible focus point and enough shutter speed.
    • Ignoring the lens limit: If the camera will not select f/1.8, the lens may not support it. Kit lenses and zoom lenses have different maximum apertures.
    • Changing several settings during a comparison: Keep framing, distance, focus, and light consistent so the aperture difference is easy to see.

    Quick practice in a garden or room


    Choose a textured object, such as a flower, mug, or small plant, and place it in front of a background with visible detail. Focus on the front edge. Photograph it at the widest aperture, then at f/5.6 and f/8. Move the object farther from the background and repeat the wide-aperture frame. You will see that subject-background distance can change blur just as clearly as the f-number.


    Before each shot, check three things: the aperture on the display, the shutter speed, and the focus indicator. Afterward, look at the actual result rather than judging only from the rear screen at arm’s length. A computer or phone display makes it easier to inspect whether the important part is sharp.


    Aperture is a creative control as well as an exposure setting. Use a wider opening when a soft background helps the subject stand out. Use a smaller opening when several parts of the scene matter. The numbers become easier to remember once you connect them to the photographs you want to make.


    Practice takeaway: Photograph one still subject at three apertures without changing your position. Compare focus depth and note how the camera compensates with shutter speed or ISO.
  • Aperture Priority: What to Check Before You Press the Shutter

    Published: Updated:

    You select f/2.8 because you want a soft background, take the picture, and find the subject blurred. In aperture priority the camera chooses shutter speed to match the light, so the aperture is only one part of the exposure. The mode is useful when you want to control depth of field, provided you check what the camera chooses in return.

    On most cameras this mode is marked A or Av. You select an aperture and the camera meters the scene, choosing a shutter speed. ISO may be fixed or automatic, depending on your settings. Names and options vary by model, so check the manual if a control behaves differently from what you expect.

    Start in steady available light

    Available light and a subject with manageable movement. The camera chooses shutter speed after you choose aperture, so watch that speed as the light changes. A still vase, a talking person, and a running child need different decisions. Check your Auto ISO range and minimum shutter-speed options if your camera provides them.

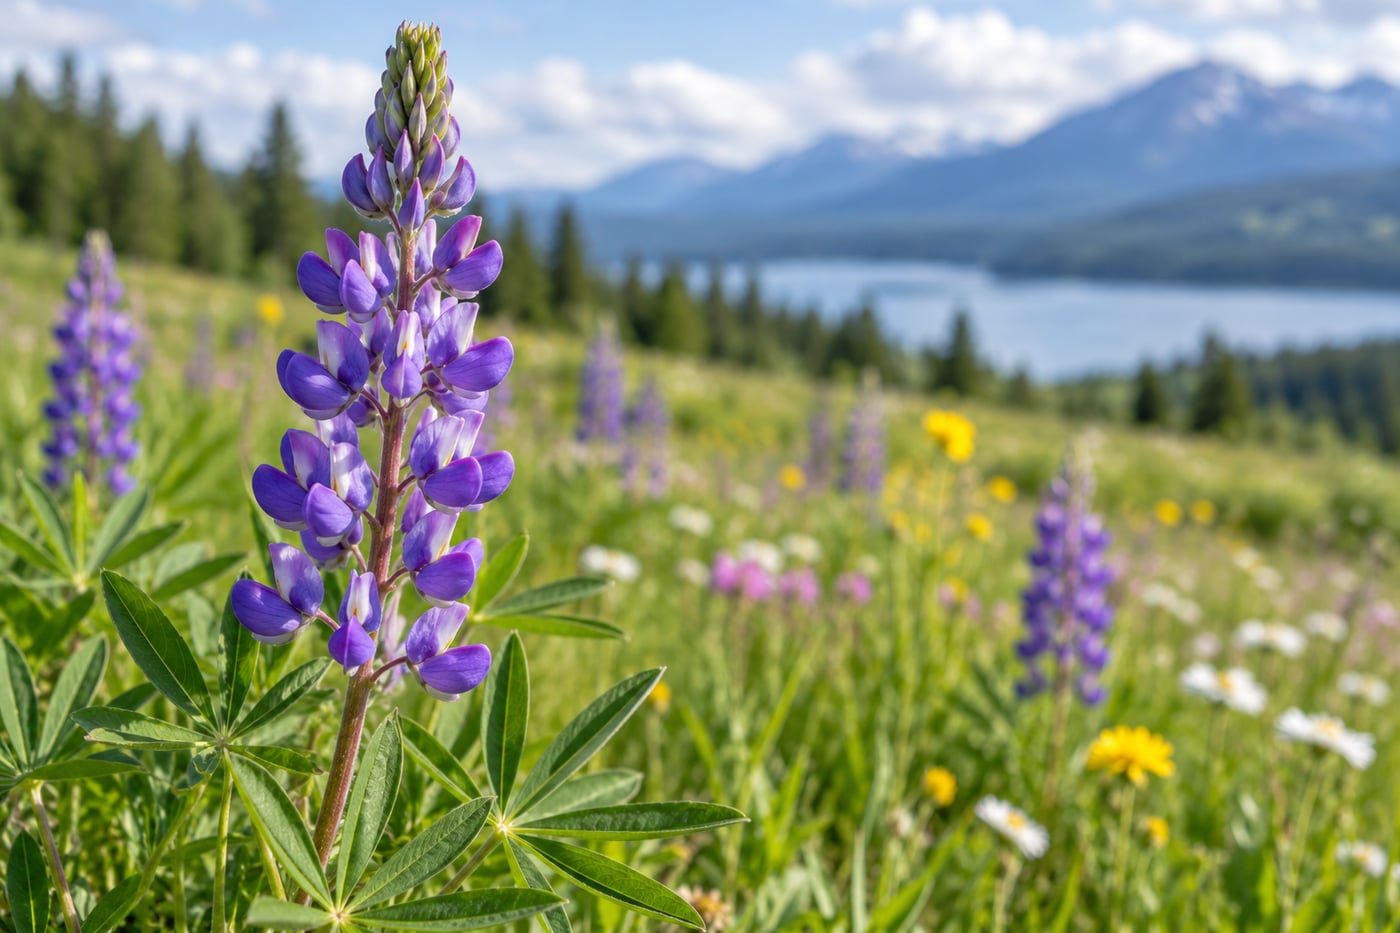
    Sharp purple flower against a softer meadow background
    AI-generated teaching illustration. It shows the scene discussed here, not a measured camera test.

    What aperture changes

    The f-number controls the lens opening. A lower number means a wider opening, which lets in more light and can produce a shallower depth of field. A higher number means a smaller opening, which lets in less light and can keep more of the scene acceptably sharp. Depth of field also depends on focus distance, focal length, and the camera format. Two photographs at the same f-number can therefore look different.

    A wider aperture can help separate a portrait from a distracting background. It can also make focusing less forgiving, especially at close distance. If the subject turns slightly, an eye that was sharp may no longer be. For a group, a very wide aperture may leave one person sharp and another soft. Stop down a little or arrange people on a similar plane, then check the result.

    A narrower aperture is often useful when several distances matter, such as a flower close to the camera and a landscape behind it. It does not make every part of the scene sharp automatically. Focus distance still matters, and very small openings can reduce fine detail through diffraction. Use a test frame and view it at the size that matters for your work.

    The shutter speed still matters

    The camera can select a shutter speed that gives the correct average brightness but is too slow for movement. A still building may remain sharp at a speed that blurs a walking person. A child running towards the camera usually needs a faster shutter than a person sitting still. Handheld camera movement can soften the whole frame, while subject movement often blurs only the moving parts.

    When the speed is too slow, consider raising ISO, opening the aperture, adding light, or changing position to support the camera. Each choice has a cost. Raising ISO can make noise more visible; opening the aperture reduces depth of field; adding light may change the look of the scene. Stabilisation can help with camera shake but does not freeze a moving subject.

    Set Auto ISO with a purpose

    Auto ISO can let the camera raise sensitivity when the light falls, helping it maintain a more useful shutter speed. Many cameras offer an upper ISO limit and, on some models, a minimum shutter speed. Read the camera menu carefully because the options differ. A focal-length based minimum may adapt to the lens, but it still may not account for a fast-moving subject.

    Set a starting limit that you are comfortable using, then test it in the kind of light you photograph. If the camera reaches the limit, it may choose a slower shutter than your chosen threshold. Look at the exposure information after each test. A setting that works for a still interior may be too slow for a child or pet.

    Watch for exposure limits in bright light

    In bright sun, a wide aperture and low ISO may still require a shutter speed faster than the camera can provide. Some cameras display a warning or blink the shutter value. Narrow the aperture, lower ISO if possible, or use appropriate light control. A neutral density filter can reduce incoming light in some situations, but know how it affects exposure and autofocus on your camera.

    Flash adds another constraint. Cameras have a maximum sync speed for many flash setups, and high-speed sync is not available with every flash or camera. Check the camera and flash manuals before relying on a particular combination. Aperture priority does not remove those limits.

    A short practice session

    Place a stationary subject near a background with some distance behind it. Use steady daylight so the light does not change much during the comparison. Set A or Av, choose a fixed ISO for the first round, and make one frame at a moderate aperture, one wider, and one narrower. Keep your position and focus point the same.

    Compare the background blur and check the subject’s important details at full size. Then make another round with Auto ISO enabled. Watch the shutter speed and ISO for each frame. You are learning two things: how the aperture changes the appearance of the scene, and how the camera adjusts exposure around your choice.

    Repeat with a person who moves slightly. Your still-subject results will not tell you which shutter speed will freeze a gesture. Make a few frames at different apertures and inspect the eyes and hands. Choose a depth of field that suits the subject, then make sure the shutter speed is adequate for its movement.

    When to switch modes

    Aperture priority is handy when depth of field is your main concern and the camera has room to choose a suitable shutter. Switch to shutter priority, often marked S or Tv, when motion blur or freezing action is the priority. Manual exposure can be useful under steady light when you want fixed control over both values. No mode can make the decision for you when the scene changes quickly.

    If the photograph is too bright or dark, check the meter and exposure compensation. A scene with lots of snow or a large dark background can fool a reflective meter because it tries to render the scene near a middle tone. Learn the adjustment in How to Use Exposure Compensation When Your Camera Gets Brightness Wrong.

    A quick pre-shutter check

    • Is the chosen aperture suited to the depth of field you want?
    • Is the camera’s shutter speed suitable for handholding and subject movement?
    • Is Auto ISO enabled and limited in a way you understand?
    • Are important highlights or shadows at risk of losing detail?
    • Did focus land on the part of the subject that matters?

    After taking the frame, review it and make one adjustment at a time. If you open the aperture, check both depth of field and the new shutter speed. If you raise ISO, check whether the shutter became fast enough. This small habit makes the mode predictable and helps you understand why a photograph changed.

    Related lessons

    Sources and further reading

    Nikon: aperture and exposure basics.

© 2026 CaptureView. All rights reserved.