Category: Camera & Lens Basics

Educational guides to exposure controls, focus, lenses, camera modes, and image files.

  • Camera Metering Modes Explained: When to Use Each One

    Published: November 14, 2026 · Updated: November 14, 2026 · By Ethan Fletcher, CaptureView contributor

    Your camera’s meter tries to choose an exposure that makes the scene’s tones average out in a familiar range. That works well for many everyday pictures, but a bright window, a dark stage, or a small subject against a large background can pull the reading away from what you intended. Metering mode changes how the camera evaluates the scene. It does not change the sensor’s dynamic range, and it cannot decide which part of the photograph matters to you.

    This guide explains evaluative or matrix metering, centre-weighted metering, and spot metering in practical terms. Names and exact behavior vary by camera, so treat them as descriptions of a general approach. A short test with your own camera is more useful than assuming two manufacturers calculate the same scene in the same way.

    What the meter is trying to do

    A reflected-light meter reads the light coming back from the scene. Since it does not know whether it is looking at white snow, a black coat, or a grey wall, it makes a best guess based on the tones in its sample area. A frame filled with a white subject may be rendered darker than you expect; a dark subject can be lifted. That is why snow can look dull grey and a night scene can look too bright.

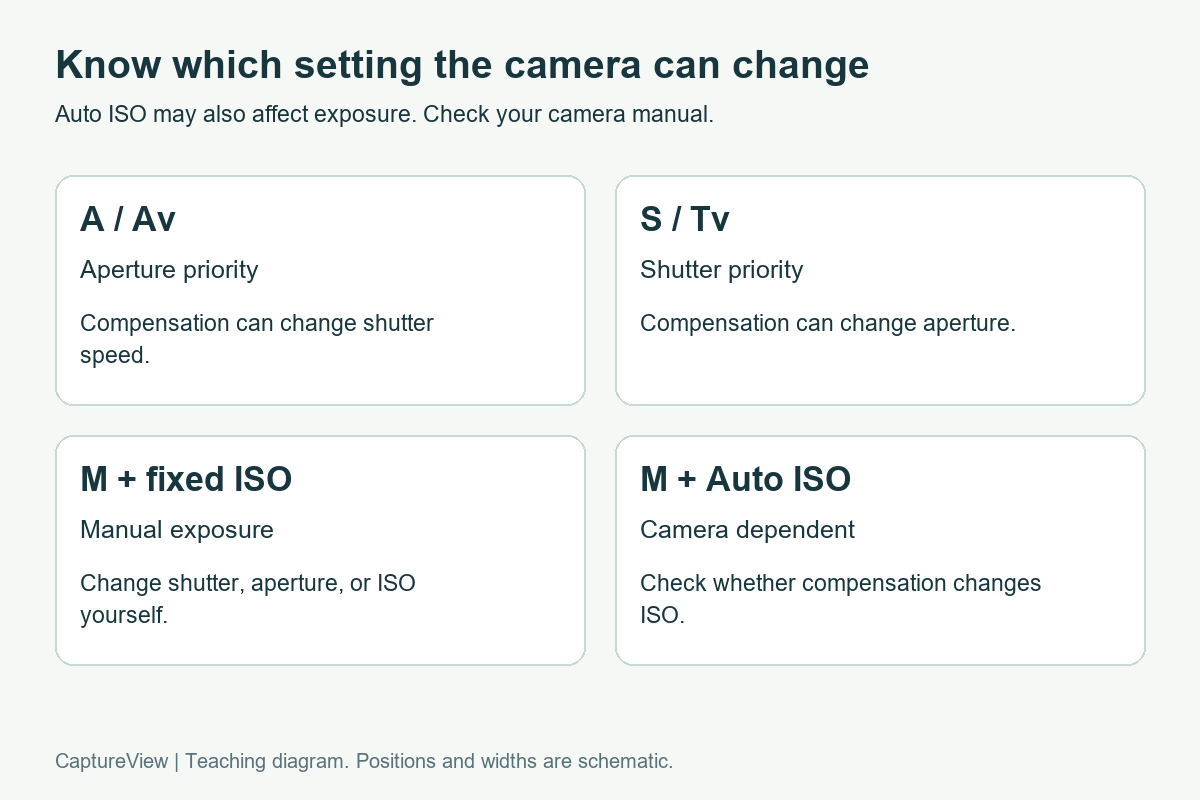
    The camera’s exposure system uses this reading together with your selected exposure mode. In aperture priority, the meter influences shutter speed. In shutter priority, it influences aperture or ISO if Auto ISO is active. In manual mode with auto ISO, the meter can influence ISO. Manual exposure with fixed ISO does not automatically change the exposure when the meter reading moves, though the meter scale still shows whether your settings differ from the camera’s suggestion.

    Evaluative or matrix metering

    Evaluative, matrix, or multi-pattern metering considers several areas across the frame. Some cameras also use focus distance, detected faces, color, or scene information in their calculation. It is the most practical starting point for general photography because it responds to the whole composition instead of depending on one small patch.

    Use it when the scene has a reasonably balanced mix of tones, when you are moving quickly, or when the subject and background both matter. It usually gives a useful exposure for travel, everyday scenes, and many landscapes. It can still be fooled by a bright sky occupying much of the frame, a white wall behind a person, or a dark subject surrounded by snow. If the result is consistently too bright or too dark, check the exposure compensation setting before changing modes. A forgotten compensation value can make the camera seem unpredictable.

    Centre-weighted metering

    Centre-weighted metering reads most of the frame but gives more importance to the middle area. It is an older, predictable approach that can be useful when the subject stays near the centre and you do not want the outer edges to dominate the reading. A person against a bright sky is one example, although a face near a window may still require you to watch highlights and shadows.

    Because it favours the centre, it is less helpful when the important subject is far off to one side. It also does not know whether the central object is white or black. If you fill the centre with a dark coat and let the camera choose exposure, the coat may become brighter and the background may lose highlight detail. Use the histogram and preview to decide whether the result suits the scene.

    Spot metering

    Spot metering reads a small area, often near the active focus point or the centre of the viewfinder. Its size and link to autofocus vary by camera. It gives you more control over which tone informs the reading, but it also asks you to choose carefully. Pointing the spot at a very bright white shirt can lead the camera to darken the exposure; pointing it at a deep shadow can lead it to brighten the scene.

    Spot metering is useful when a small subject matters more than the background, such as a performer under a spotlight or a backlit face. It is also useful for comparing tones in a high-contrast scene. If you meter from a face, remember the reading is still based on reflected light. Skin tone, makeup, shadows, and the camera’s calibration all affect the result. Start with the face, take a frame, and check whether the highlights on the skin and the surrounding scene retain the detail you need.

    Metering is not the same as focus

    Autofocus determines where the lens should be sharp. Metering estimates exposure. Some cameras link a spot-meter area to the selected focus point, but that does not make the two systems identical. A focus point can sit on a dark eye while the exposure system evaluates most of the frame. Conversely, a spot meter can read a bright background while autofocus remains locked on the subject.

    If your camera offers exposure lock, you can aim the meter at the area you want to read, lock that exposure, recompose, and then focus on the subject. Check your manual to learn how long the lock remains active and whether pressing the shutter halfway changes it. This technique can be useful when the subject moves off centre, but you should confirm that the locked reading still makes sense after you recompose.

    Practical examples

    Backlit portrait: Evaluative metering may balance the person and the bright background, but the face can remain dark. Try a spot reading from the face or use exposure compensation to brighten the subject, then check whether the sky clips. If keeping the window or sunset detail is essential, use fill flash or change the subject’s position rather than expecting a meter mode to create light that is not there.

    Snow or a pale wall: The camera may reduce exposure because a large bright area looks unusually light to the meter. Check the image and histogram; positive exposure compensation may restore a brighter appearance. Avoid copying a fixed compensation value from someone else, since the amount depends on the light, composition, and camera.

    Dark stage with a spotlight: A wide-area mode may react to the dark auditorium and brighten it, potentially washing out the performer. Spot metering on the lit subject can be a better starting point. Take a test frame as the lighting changes and protect important highlights. If the performer is moving, shutter speed may be more important than matching the camera’s suggested brightness exactly.

    Landscape with bright sky: Matrix metering usually balances the frame, but a large bright sky may still leave the foreground too dark. A graduated neutral-density filter can reduce the difference between sky and ground, while shooting RAW can give more room to adjust recoverable tones later. Neither option can restore detail that was clipped or lost to noise.

    A quick way to test the modes

    Choose a stationary subject beside a bright window. Keep the camera position fixed and use the same aperture, shutter speed, and ISO for each frame in manual exposure. Switch among evaluative, centre-weighted, and spot modes while watching the meter scale. In fully manual exposure, the recorded brightness should not change when only metering mode changes; what changes is the meter’s recommendation. Then repeat in aperture priority and note how the shutter speed responds.

    For the second test, place a mid-tone object in the centre and then move it to the edge. Compare the readings in centre-weighted and spot modes. If your camera ties the spot area to the active focus point, move that point deliberately and see whether the reading follows. Record what your specific model does. This small test helps you understand the controls before a moment that cannot be repeated.

    Choose the simplest mode that works

    Changing metering mode is not a requirement for every difficult exposure. Many photographers leave evaluative metering on and use exposure compensation when a scene needs to be brighter or darker than the camera’s default. Spot metering is helpful when you can identify a meaningful area to read and have time to check the result. Centre-weighted metering offers a middle ground when the subject stays near the centre.

    Whichever mode you choose, review the photograph rather than treating the meter as a verdict. Look at the subject, important highlights, shadows, and histogram. If the exposure is wrong, ask what area influenced the reading and whether the subject moved. Then change one control and take another frame. Understanding the meter gives you a reason for each adjustment—and keeps you from cycling through menu settings without knowing what changed.

    Camera menus and metering names differ between models. Check your camera’s manual for the size of its spot area, how exposure lock works, and whether spot metering follows the autofocus point.
  • What Does Aperture Do? A Beginner’s Guide to Exposure and Background Blur

    By Owen Ellis, CaptureView editorial pen name


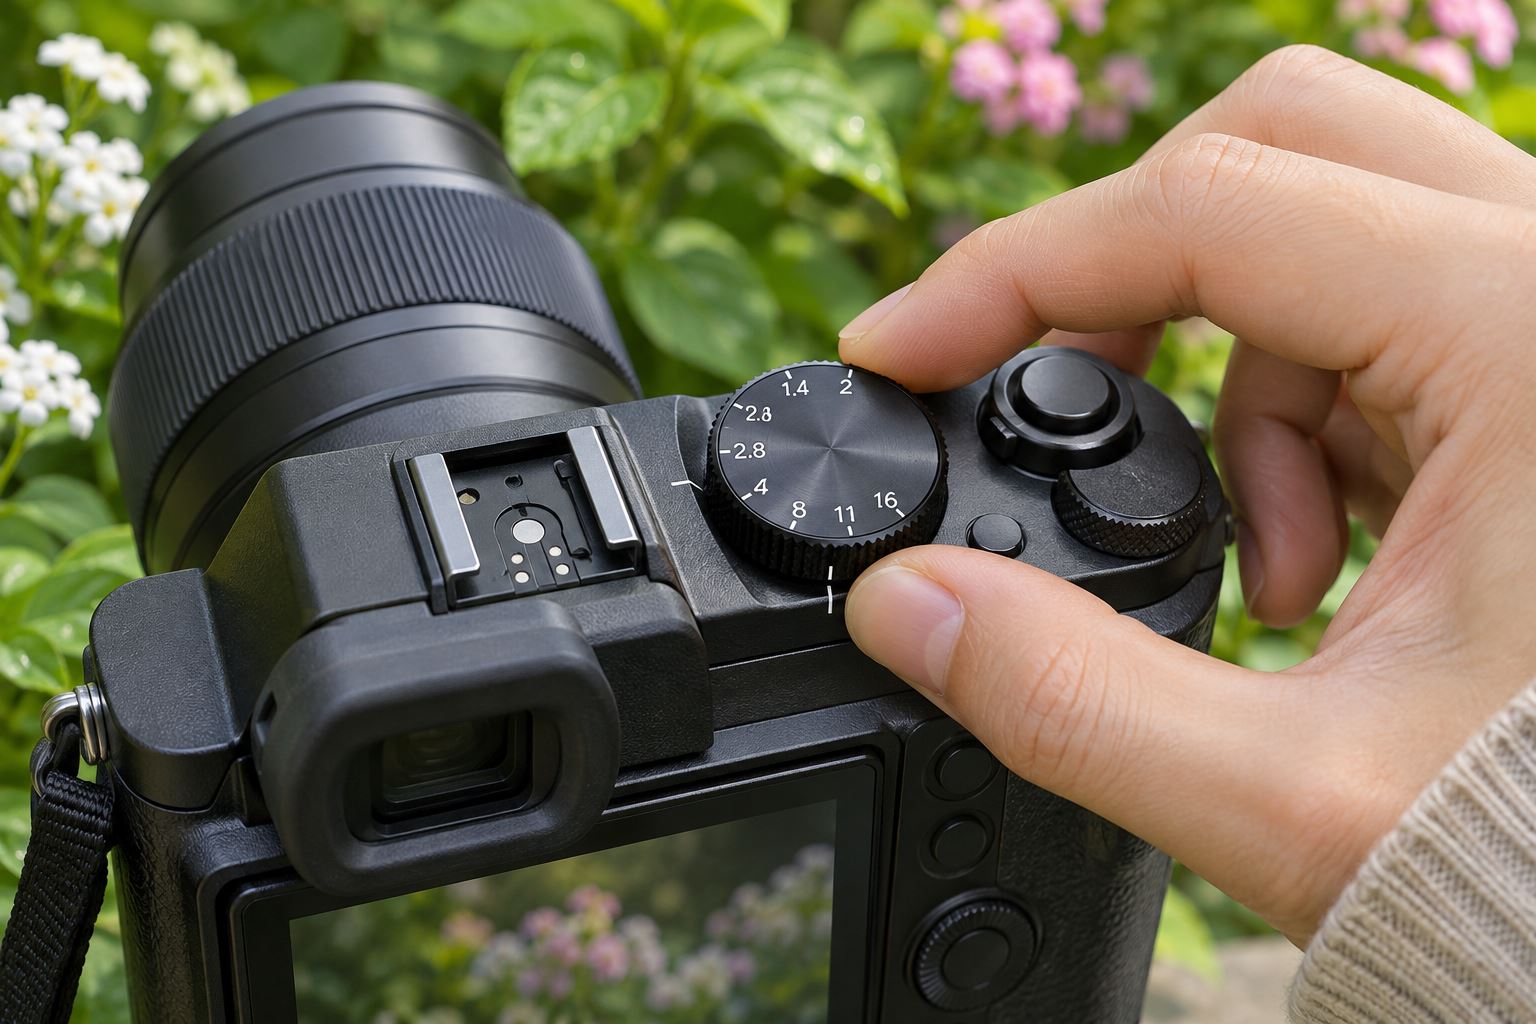
    A hand turning the aperture dial on a camera outdoors
    The aperture setting controls how much light passes through the lens and affects depth of field.

    Aperture is the opening inside a lens. It changes how much light reaches the camera sensor and how much of the scene appears in focus from front to back. Those two effects are linked, which is why aperture can feel confusing at first. A low f-number means a wide opening; a high f-number means a smaller opening.


    You do not need to memorize every setting before making a photograph. Start by deciding whether you want more background blur or more of the scene to look sharp. Then choose an aperture that fits that goal, take a test photo, and check both the subject and the exposure.


    What the f-number means


    Aperture is written as an f-number, such as f/2, f/4, f/8, or f/16. The scale runs in an unintuitive direction: f/2 is wider than f/8. At f/2, the lens opening is relatively large and lets in more light. At f/16, the opening is smaller and lets in less.


    Each full stop changes the amount of light by a factor of two. Moving from f/4 to f/5.6 halves the light. Moving from f/5.6 to f/8 halves it again. In the other direction, f/8 to f/5.6 doubles the light. Many cameras let you adjust aperture in smaller one-third-stop steps, so the numbers on the dial may not jump through the full-stop sequence.


    Why a wide aperture blurs the background


    A wide aperture can create a shallow depth of field: a narrower range in front of and behind the focus point appears acceptably sharp. That is useful for a portrait when you want attention on the eyes and less on a busy room. It does not automatically make the background disappear. The amount of blur also depends on how close you are to the subject, the distance between the subject and background, and the lens focal length.


    For a simple test, place a person or object a few feet in front of a distant background. Take one photo at the widest aperture available, then make another at f/8 without moving the camera. Compare the background, but also inspect the focused detail. If the subject is not sharp, the focus point may have landed in the wrong place or the shallow focus area may be too small.


    With a kit zoom, the widest available aperture often changes as you zoom. The camera may show a range such as f/3.5–5.6. That means the lens opens to f/3.5 at the wide end and only f/5.6 at the telephoto end. This is normal. You can still soften a background by increasing the distance between subject and background or by using the longer focal length from farther away.


    Why a smaller aperture keeps more in focus


    A smaller aperture, such as f/8 or f/11, generally increases depth of field. It can help when photographing a landscape, a group, or a tabletop scene where you want several important details to remain sharp. Focus still matters: a small aperture cannot make every distance perfectly sharp, and very small openings such as f/22 can reduce fine detail because of diffraction.


    For a landscape, f/8 is a useful starting point on many lenses. Focus on a meaningful area within the scene rather than automatically focusing at the farthest mountain. If the foreground is close and must be sharp too, make a test image and zoom in to check it. A tripod can help when the smaller aperture requires a slower shutter speed.


    Aperture changes exposure too


    Exposure is controlled by aperture, shutter speed, and ISO. If you close the aperture by one stop, the image receives half as much light unless another setting compensates. In aperture priority mode, the camera usually adjusts shutter speed for you. In manual mode, you choose the other settings yourself. Auto ISO can also raise sensitivity when the light is low.


    Watch the shutter speed when you select a small aperture indoors or at dusk. A value that is too slow can make a handheld photo blurry. If the camera drops below a comfortable speed, open the aperture, raise ISO, add light, or use support. The right choice depends on whether motion blur or noise would be more distracting in that particular picture.


    Try aperture priority as a learning tool


    Set the mode dial to A or Av, depending on the camera brand. Choose an aperture and let the camera select shutter speed. Keep ISO on Auto at first, with a reasonable upper limit if your camera allows it. This gives you room to explore depth of field without having to adjust every exposure control at once.


    Make three frames of the same still subject at the widest aperture, f/5.6, and f/8. Keep your position and focus point fixed. Review the files at the same magnification. Note how the background changes and whether the shutter speed or ISO moved. If the camera used a shutter speed too slow for handheld work, repeat the test with more light or a tripod.


    Common aperture mistakes


    • Choosing the lowest number every time: A very wide aperture can leave one eye sharp and the other soft in a close portrait. Try one stop smaller if you need more depth of field.
    • Expecting f/16 to fix missed focus: It increases the range that looks sharp, but you still need a sensible focus point and enough shutter speed.
    • Ignoring the lens limit: If the camera will not select f/1.8, the lens may not support it. Kit lenses and zoom lenses have different maximum apertures.
    • Changing several settings during a comparison: Keep framing, distance, focus, and light consistent so the aperture difference is easy to see.

    Quick practice in a garden or room


    Choose a textured object, such as a flower, mug, or small plant, and place it in front of a background with visible detail. Focus on the front edge. Photograph it at the widest aperture, then at f/5.6 and f/8. Move the object farther from the background and repeat the wide-aperture frame. You will see that subject-background distance can change blur just as clearly as the f-number.


    Before each shot, check three things: the aperture on the display, the shutter speed, and the focus indicator. Afterward, look at the actual result rather than judging only from the rear screen at arm’s length. A computer or phone display makes it easier to inspect whether the important part is sharp.


    Aperture is a creative control as well as an exposure setting. Use a wider opening when a soft background helps the subject stand out. Use a smaller opening when several parts of the scene matter. The numbers become easier to remember once you connect them to the photographs you want to make.


    Practice takeaway: Photograph one still subject at three apertures without changing your position. Compare focus depth and note how the camera compensates with shutter speed or ISO.

  • Why snow looks grey in photos and how to expose it

    Why snow looks grey in photos and how to expose it

    You photograph a field of white snow and the result looks dull grey. The light has not necessarily changed. The camera may have chosen an exposure that makes a predominantly bright scene darker than you intended.

    Check the photograph first. If the snow looks too dark, try positive exposure compensation and take another frame. Keep an eye on the brightest textured areas as you increase it. Snow can look bright while still showing footprints, ridges, and the shape of the ground.

    Why the meter can darken a snowy scene

    The camera measures reflected light. A frame full of snow sends it a different mix of tones from a frame full of dark trees. Depending on the metering mode and camera, automatic exposure may pull the bright scene toward a middle tone. Canon explains this behaviour in its snow photography guide.

    How much correction you need depends on the composition. A close view of snow and a view containing a dark cabin can produce different meter readings in the same light. Recheck exposure after reframing, especially when you include more sky or a much darker subject.

    Make one small exposure change

    In aperture priority, choose an aperture that suits the scene, then take a reference frame at zero compensation. If the snow is too dark, try +2/3 EV. Compare the new photograph with the first. Increase or reduce the compensation in small steps until the important snow looks bright and retains the detail you want.

    The +2/3 EV setting is a starting experiment, not a fixed snow preset. Some scenes need more correction; others need none. Strong sunlight on a snowbank can leave less room to brighten the image than soft light on an overcast day.

    Four camera exposure modes and the settings exposure compensation can change
    The effect of compensation depends on the mode and Auto ISO behaviour. Check your camera manual.

    Watch the shutter speed while you adjust. In aperture priority with fixed ISO, positive compensation normally lengthens the exposure. If you are handholding or photographing moving people, make sure the resulting shutter speed remains suitable. Auto ISO can alter how the camera reaches the requested brightness.

    Check highlights before adding more

    Magnify a bright patch of snow that matters to the photograph. Can you still see its surface? Enable highlight warnings if your camera offers them. Broad flashing areas across an important snowbank are a reason to check the exposure more carefully and try less compensation.

    A few tiny sparkles can reach pure white without spoiling the photograph. A large featureless patch across the main subject is a different decision. Choose which details you need to preserve instead of treating every bright pixel as an error.

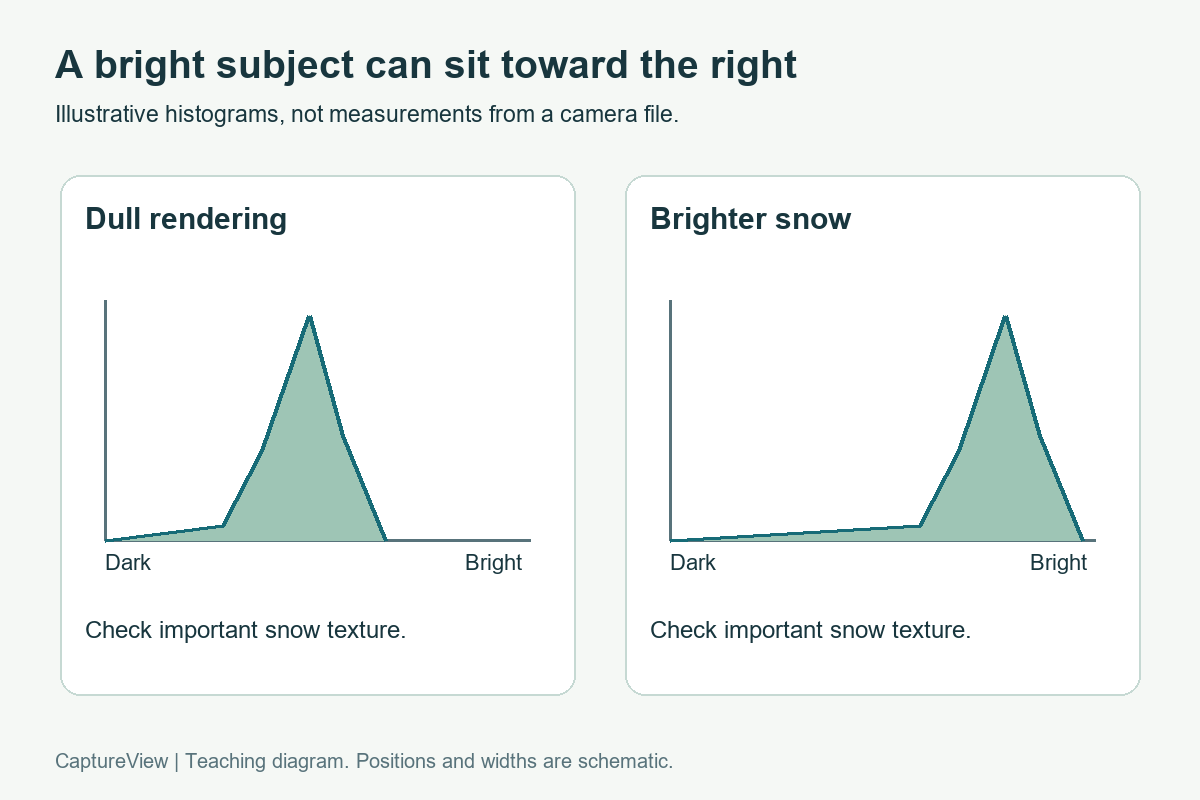
    Schematic histograms comparing dull snow rendering with a brighter result
    A bright subject can put much of the graph toward the right. These shapes illustrate the idea and are not measured camera data.

    A snowy scene can place much of its histogram toward the bright end. The graph does not need to form a hill in the middle. Check whether important bright areas are being cut off at the right edge. If your camera shows separate RGB histograms, inspect those too; a single channel can reach its limit before a combined brightness graph makes the problem obvious.

    Camera histograms and warnings usually describe the processed preview. Picture styles and white balance can affect that preview, so use them as guidance and leave some margin when the detail matters. A raw file offers editing flexibility, but it cannot restore detail that the sensor never recorded.

    When the compensation dial seems to do nothing

    In manual exposure with a fixed ISO, the camera has no exposure setting left to change automatically. Turning compensation may move a meter indication without brightening the recorded image. Change shutter speed, aperture, or ISO yourself, then make another frame.

    Manual mode with Auto ISO behaves differently across cameras. Some models let compensation change ISO; others restrict it. Check the relevant section of your camera manual. If the image is unchanged, confirm which settings actually moved and whether an ISO or aperture limit has been reached. Our camera basics guide is a useful place to review the controls.

    Grey snow and blue snow need different checks

    A photograph can have acceptable brightness and still look too blue. Snow in shade often reflects blue sky. Raising exposure changes brightness; white balance changes colour rendering. Compare the snow in sun with the snow in shade before trying to make every patch neutral.

    For a practice sequence, keep white balance unchanged while testing exposure. Once you have chosen the brightness, compare a different white balance on a copy or in your raw editor. This makes it easier to see which change solved which problem. The editing lesson covers keeping an original and comparing restrained adjustments.

    Try the comparison close to home

    1. Choose a safe, accessible scene with a textured patch of snow and a darker object.
    2. Keep the framing, aperture, and white balance steady. Take a zero-compensation reference.
    3. Try +2/3 EV, then adjust from what you see. Check both snow texture and shutter speed.
    4. Reframe to include more of the dark object. Notice whether the meter changes its recommendation.
    5. Reset compensation to zero when you finish so it does not carry into the next shoot.

    A white towel or folded white fabric in indirect daylight can stand in for snow when you practise metering indoors. Keep folds visible and repeat the same comparison. It will not reproduce outdoor snow lighting, but it gives you a bright subject on which to learn the compensation control.

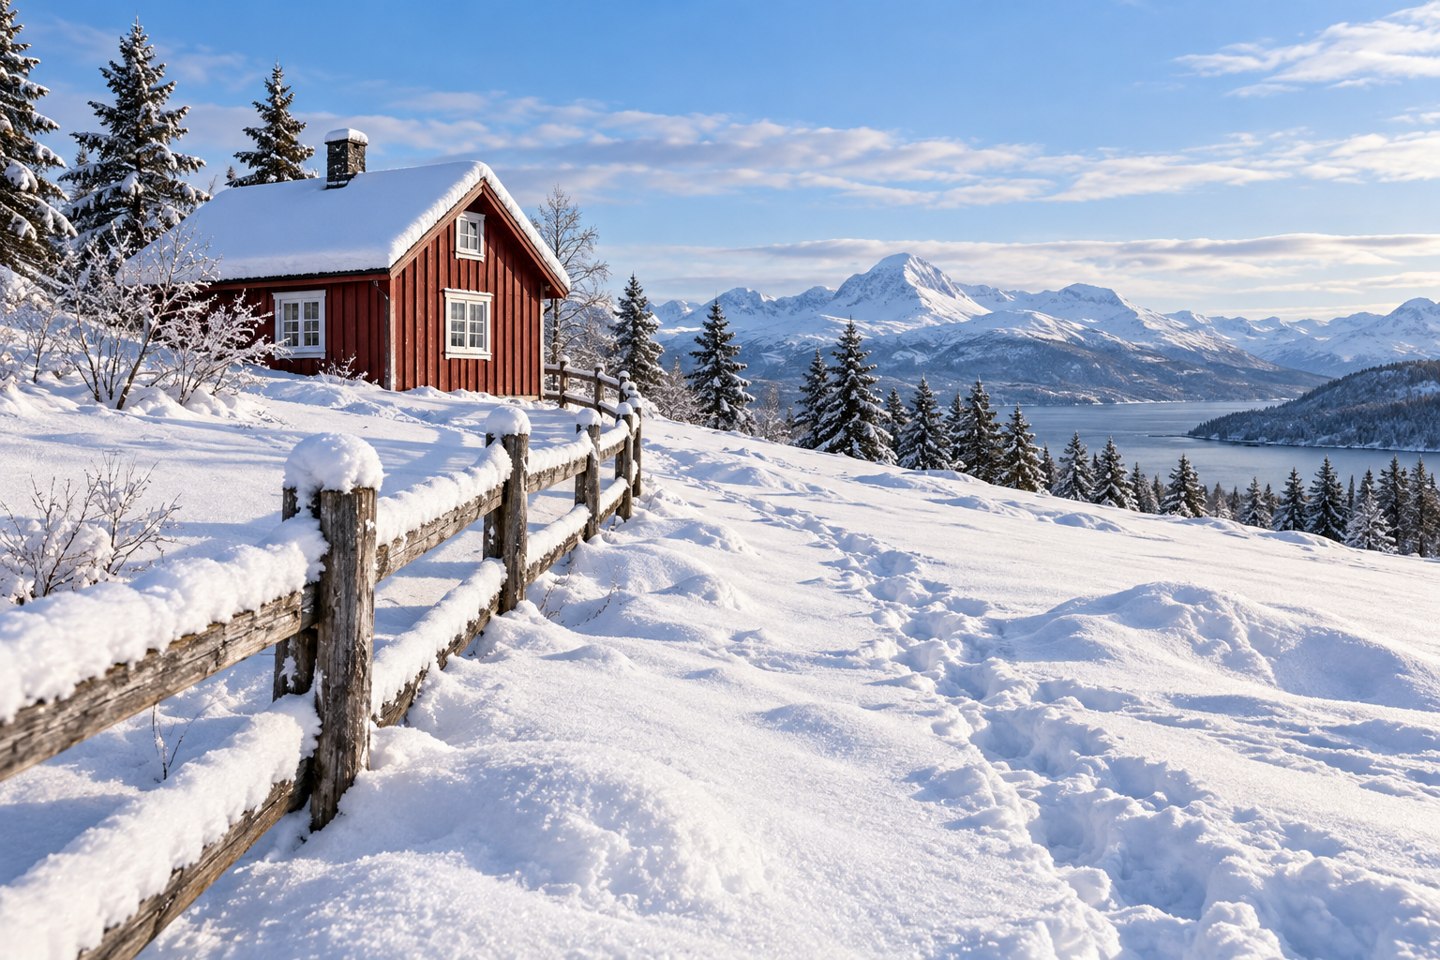
    Scene photograph: AI-generated teaching illustration. Diagrams are schematic and do not report measured camera results.

  • RAW or JPEG for Beginners: Choose a File You Can Actually Use

    Published: Updated:

    You finish a shoot, copy the files, and discover that your usual viewer cannot open them. The camera was set to RAW. The photographs are not necessarily damaged; your software may not support that camera’s format, or it may need an update. This is a common first surprise when switching file types.

    RAW and JPEG describe different ways of storing a photograph. JPEG is a processed image that is ready to view and share. A RAW file keeps sensor data for compatible software to interpret and process. One is not automatically better for every situation. Your choice depends on how much editing you plan to do and whether you can manage the files afterwards.

    Check your software and storage

    A workflow you can finish after the shoot. Before choosing RAW, check that your editor supports files from your camera and that you have space to keep the originals. JPEG can be useful when you need a ready-to-share file quickly; RAW is useful when you are prepared to process it. The choice should fit the actual lighting and editing task.

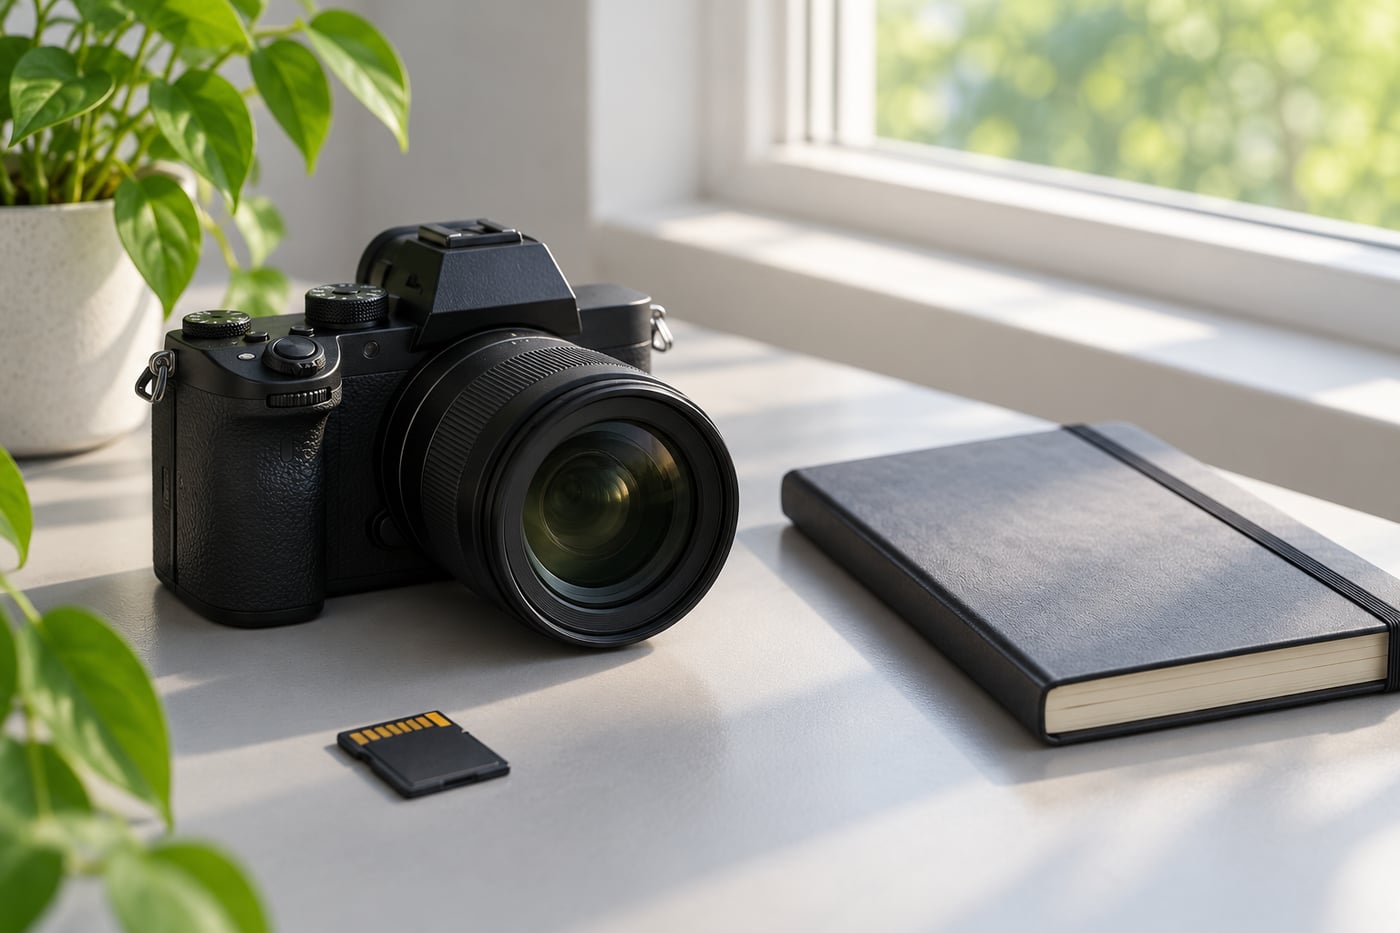
    Unbranded camera and memory card beside a notebook
    AI-generated teaching illustration. It shows the scene discussed here, not a measured camera test.

    What the camera does to a JPEG

    A JPEG contains the camera’s processing choices, including colour, contrast, sharpening, and noise reduction. The camera has already converted the captured data into a familiar image. That is why JPEGs open on most phones and computers, attach easily to a message, and are convenient for a quick delivery.

    Many cameras let you adjust picture styles, white balance, and contrast before taking the photograph. These settings influence the JPEG. Some camera previews also show an embedded JPEG even when you record RAW, so the playback screen is not always a direct preview of how the RAW file will look in editing software.

    You can edit a JPEG. Exposure, colour, crop, and local adjustments are all possible. The limitation is that the image has already been processed and compressed. Large changes to brightness or colour can reveal banding, noise, or lost detail, especially in skies and shadows. Repeatedly saving a JPEG can also add compression damage. Keep the original and export a new copy after editing.

    What a RAW file gives you

    A RAW file stores data from the camera sensor along with metadata that tells compatible software how the image was captured. The software renders that data into a viewable photograph. You choose how to interpret white balance, contrast, sharpening, and other adjustments, then export a JPEG or another format for sharing.

    This extra control helps when the light is mixed, a scene is slightly underexposed, or you want to decide the colour treatment later. It does not mean that every RAW photograph will look better by itself. The first rendering may appear flatter or less saturated than the camera’s JPEG because the camera’s processing has not been applied in the same way.

    RAW files are commonly larger than JPEGs, though the exact size depends on camera, image content, bit depth, and compression settings. They also need software that supports your camera model. Check support for the exact model, especially if it is new. A program that reads RAW files from one camera may not yet recognise files from a later release.

    RAW cannot repair every capture problem

    A RAW file gives more latitude for some tonal and colour adjustments, but it cannot restore focus that landed on the background or remove motion blur caused by a slow shutter. If a bright area is clipped in the sensor data, detail may be gone. If the subject moved during the exposure, changing the file type will not freeze it.

    It is still worth checking the photograph while you can take another frame. Zoom in on a test image when focus is critical, watch the histogram if you understand it, and make another exposure when highlights or shadows are important. A well-exposed JPEG can be more useful than a poorly focused RAW file.

    When JPEG is the sensible choice

    JPEG is a good fit when you want files that are easy to view, upload, print, or send without a separate editing step. It can suit travel notes, family records, classroom exercises, quick event previews, and situations where you need to deliver a finished image soon after capture.

    It is also a practical format when storage or computer space is limited. The smaller files leave more room on a card and make backups quicker. If you are learning exposure and composition, a simple JPEG workflow can help you spend your attention on the photograph rather than managing a long editing queue.

    Choose a JPEG quality setting appropriate for your use. A high-quality setting is usually preferable when you may crop or print later. If your camera offers different image sizes, check the manual so you understand the trade-off before an important shoot.

    When RAW earns the extra work

    RAW makes sense when you expect to edit the photographs and want greater flexibility over the final rendering. It is especially helpful when white balance may need correction or when you want to adjust shadows and highlights carefully. This can be useful for landscapes, interiors, and other scenes with a wide range of tones, although exposure and lighting still matter more than the file label.

    Choose RAW only after you have a way to import, edit, export, and back up the files. The workflow can be straightforward once set up, but it adds steps. Store the untouched originals somewhere safe and export finished copies to a separate folder. Avoid treating a catalogue or cloud preview as your only backup.

    RAW + JPEG: useful for learning

    If your card has space, recording both formats for a short trial lets you compare their behaviour. Photograph a still subject in steady light. Keep the JPEG unchanged, then process a copy of the RAW in software that supports your camera. Try a modest white-balance change and a small brightness adjustment. Export the result as JPEG so both files can be viewed side by side.

    Compare the files at the same size and on the same screen. Look at skin or neutral objects for colour, check shadows for noise, and inspect bright areas for detail. Do not compare a camera JPEG against a heavily edited RAW export and conclude that the format alone caused the difference. Keep your changes restrained so you can learn what each file offers.

    Recording both creates two files for each frame. Decide how you will name, group, and back them up. Some programs pair the RAW and JPEG automatically; others show them separately. Learn how your software handles pairs before deleting either version.

    A simple decision for your next shoot

    • Choose JPEG if you need a finished file quickly and prefer a light workflow.
    • Choose RAW if you plan to edit and have confirmed software support and storage.
    • Choose RAW + JPEG for a limited comparison when you are learning, then review how many files you actually use.

    Whatever you select, make a test photograph and check it on a computer or phone before an important session. Confirm that the file opens, looks as expected, and can be backed up. Small preparation now can prevent a frustrating surprise after a full day of shooting.

    Export and keep your originals

    For ordinary web sharing, JPEG in sRGB is a practical starting point because browsers and devices widely support it. Use an image size that suits the destination, and keep a full-resolution original if you might print or crop later. Your editor may offer other formats for particular tasks; check the recipient or platform requirements rather than assuming one export fits everything.

    Keep capture files separate from exported versions. Use clear folder names by date or project, and make a second copy on a different device or service. An export is a finished viewing copy, not a substitute for a backup of the original file you intend to preserve.

    Related lessons

    Sources and further reading

    Adobe: Camera Raw files and JPEG processing.

  • Why a Wider Lens Does Not Automatically Fit More Into a Better Photo

    Published: Updated:

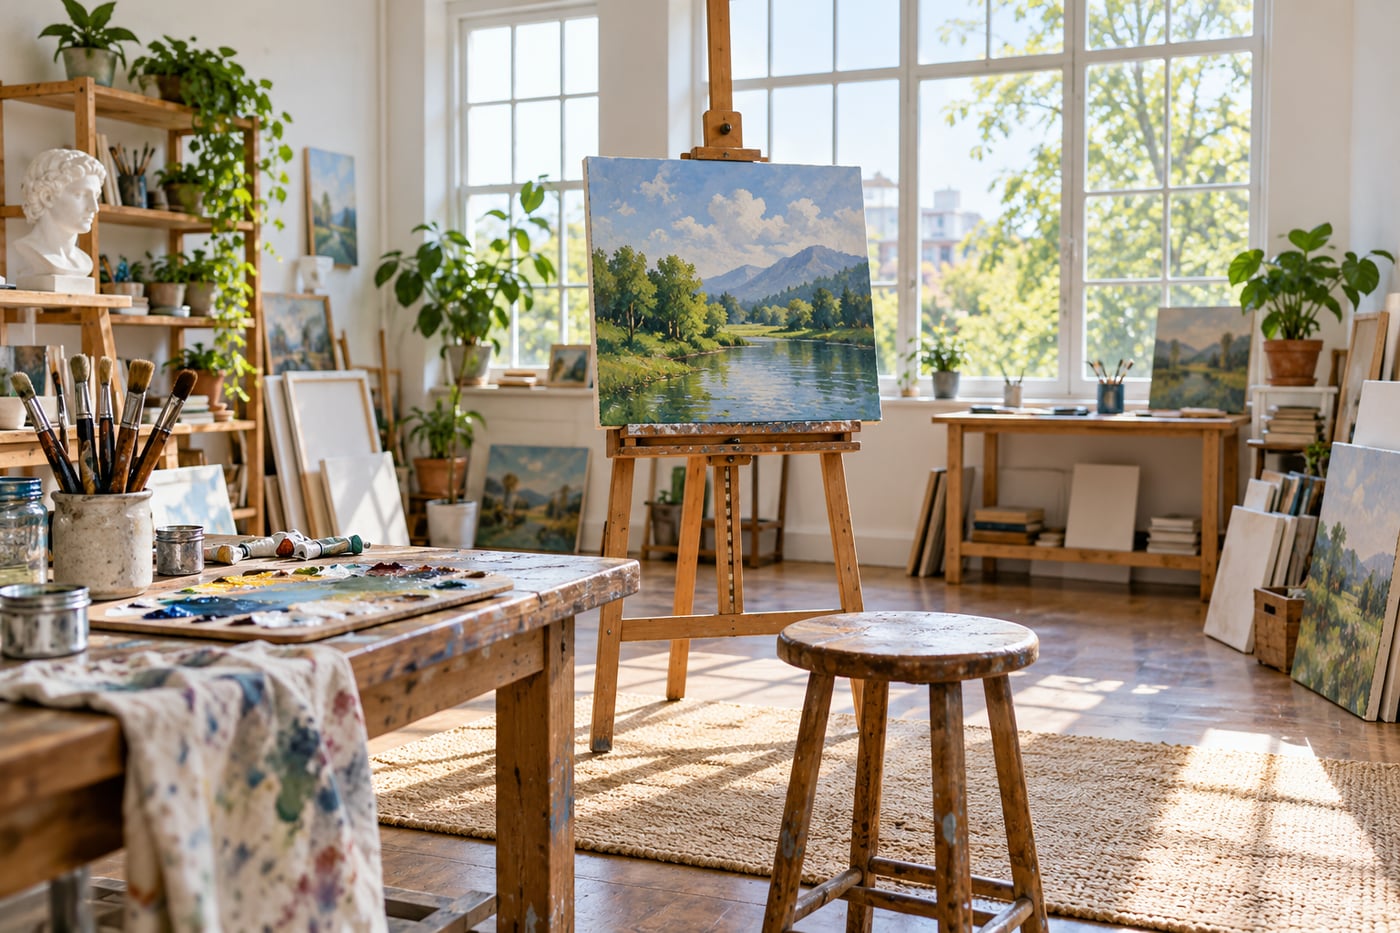
    A wider view can bring the room, window, floor, and ceiling into the frame. Check whether those details help explain the subject before including all of them.

    Leave room to change your viewpoint

    A safe location where viewpoint can be changed. Use the same subject and pay attention to your camera position as well as focal length. If you move closer to keep the subject large with a wider lens, nearby objects become more prominent relative to the distance behind them. Do not step into a road or restricted area to reproduce a composition.

    Wide view of a bright art studio with an easel and foreground stool
    AI-generated teaching illustration. It shows the scene discussed here, not a measured camera test.

    Choose what the extra space explains

    A wider view can connect a subject to its surroundings: a person in a workshop or a tree beside a path. If the extra space only adds furniture, signs, or bright corners, a tighter frame may communicate more clearly.

    Before zooming wider, finish this sentence: “I want to include the surroundings because…” If the answer is unclear, make a narrower version for comparison.

    Close objects can dominate

    Using a wide view often encourages you to move closer. From a close viewpoint, nearby objects look larger relative to distant ones. A foreground rock can become an anchor; an accidental hand near the lens can become a distraction.

    This relationship comes from camera position. Changing focal length from the same position changes framing. Moving the camera changes perspective. Keep that distinction in mind when comparing lenses.

    Check all four edges

    A wide frame can gather details you did not notice while looking at the subject. Scan the edges for bright lamps, half-visible people, and awkward cuts. Also check whether important objects near the corners look stretched in a way you dislike.

    For people, avoid placing faces very close to the edges of an extremely wide view unless the effect is deliberate.

    Watch camera tilt around buildings

    Pointing the camera upwards makes vertical lines converge. This can communicate height, but it may be distracting in a straightforward room photograph. Keeping the camera level changes the framing and can reduce convergence.

    Perspective corrections in editing can require a crop and stretch detail. Leave room if you expect to correct the frame later, and inspect the result rather than assuming software will solve it cleanly.

    A useful comparison

    1. Choose a subject with a clear surrounding setting.
    2. Make a wide frame from your first position.
    3. Make a tighter frame without moving.
    4. Move and make a new wide frame that removes one distraction.

    Compare context, foreground scale, and the edges. Read focal length and camera position and composition for the next experiment.

    Related lessons

    Sources and further reading

    Adobe: viewpoint and composition.

  • How to Choose an Autofocus Area for a Still Subject

    Published: Updated:

    The camera focuses quickly, but on the bookshelf behind your cup. A large automatic focus area found something with clear detail. That was not necessarily the subject you wanted.

    Begin with a subject that stays still

    A subject that can hold roughly the same position. Choose one clear feature, such as the nearer eye or a product label, and compare repeated frames without changing your composition radically. A subject turning towards you is no longer the same still-subject exercise. Small focus areas can also struggle over plain surfaces with little contrast.

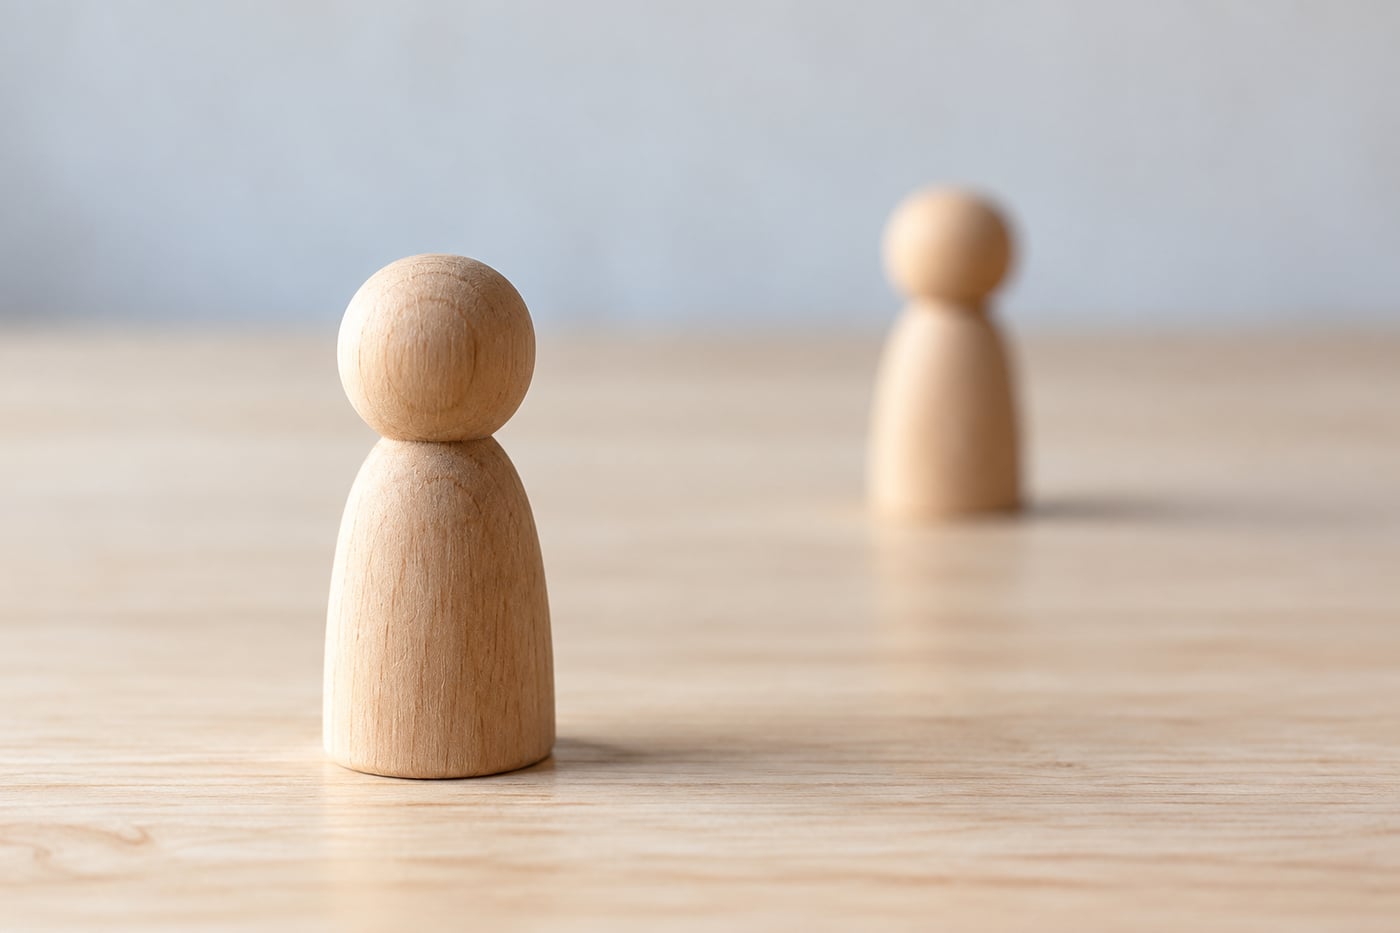
    Near wooden figure in focus with a farther figure softened
    AI-generated teaching illustration. It shows the scene discussed here, not a measured camera test.

    Focus mode and focus area do different jobs

    The autofocus mode controls how focus responds over time. Single autofocus generally acquires focus for a still subject; continuous autofocus keeps updating for movement. The focus area controls where the camera looks.

    For a stationary object, single autofocus with a small selectable area is a manageable starting point. Your camera may call the area a point, spot, or flexible spot.

    Put the area on useful detail

    Choose an edge or textured part at the distance you want sharp. A plain white surface, reflection, or very dark area can be difficult for autofocus. Moving the point to a clearer detail on the same plane can help.

    On a face, the nearer eye is often a useful target. Eye detection can help, but confirm which eye the camera selected and review the result. After using eye detection, magnify the selected eye in playback to check the focus.

    A very small area is not always better

    A tiny point offers precise placement but can miss a subject when you or the subject moves. A slightly larger area can be easier to keep on a person. It can also include background detail, so check where focus actually lands.

    Try two area sizes on the same subject. Compare consistency as well as sharpness. The smallest option is useful only if you can place it reliably.

    Be careful with focus and recompose

    Focusing in the centre and then turning the camera to reframe can shift the relationship between the focus plane and subject. At close distances with shallow depth of field, the eye may become soft. Moving the focus point towards the intended position avoids a large reframing movement.

    Review the important detail

    Magnify the subject in playback. If a background edge is sharp and the target is soft, check focus selection. If both show directional streaks, investigate camera shake. A slow shutter can spoil a frame even when autofocus selected the right distance.

    Place a cup in front of some books. Focus on a clear edge of the cup, then on the books, without moving the camera. Magnify both files and compare which distance is sharp. Continue with focus and sharpness and portrait practice.

    If you sway forwards and backwards while shooting, reconsider focus mode, aperture, and your stance. A smaller focus area alone will not keep the subject at the same distance.

    Related lessons

    Sources and further reading

    Nikon Z50 manual: focus mode (model-specific example).

  • Aperture Priority: What to Check Before You Press the Shutter

    Published: Updated:

    You select f/2.8 because you want a soft background, take the picture, and find the subject blurred. In aperture priority the camera chooses shutter speed to match the light, so the aperture is only one part of the exposure. The mode is useful when you want to control depth of field, provided you check what the camera chooses in return.

    On most cameras this mode is marked A or Av. You select an aperture and the camera meters the scene, choosing a shutter speed. ISO may be fixed or automatic, depending on your settings. Names and options vary by model, so check the manual if a control behaves differently from what you expect.

    Start in steady available light

    Available light and a subject with manageable movement. The camera chooses shutter speed after you choose aperture, so watch that speed as the light changes. A still vase, a talking person, and a running child need different decisions. Check your Auto ISO range and minimum shutter-speed options if your camera provides them.

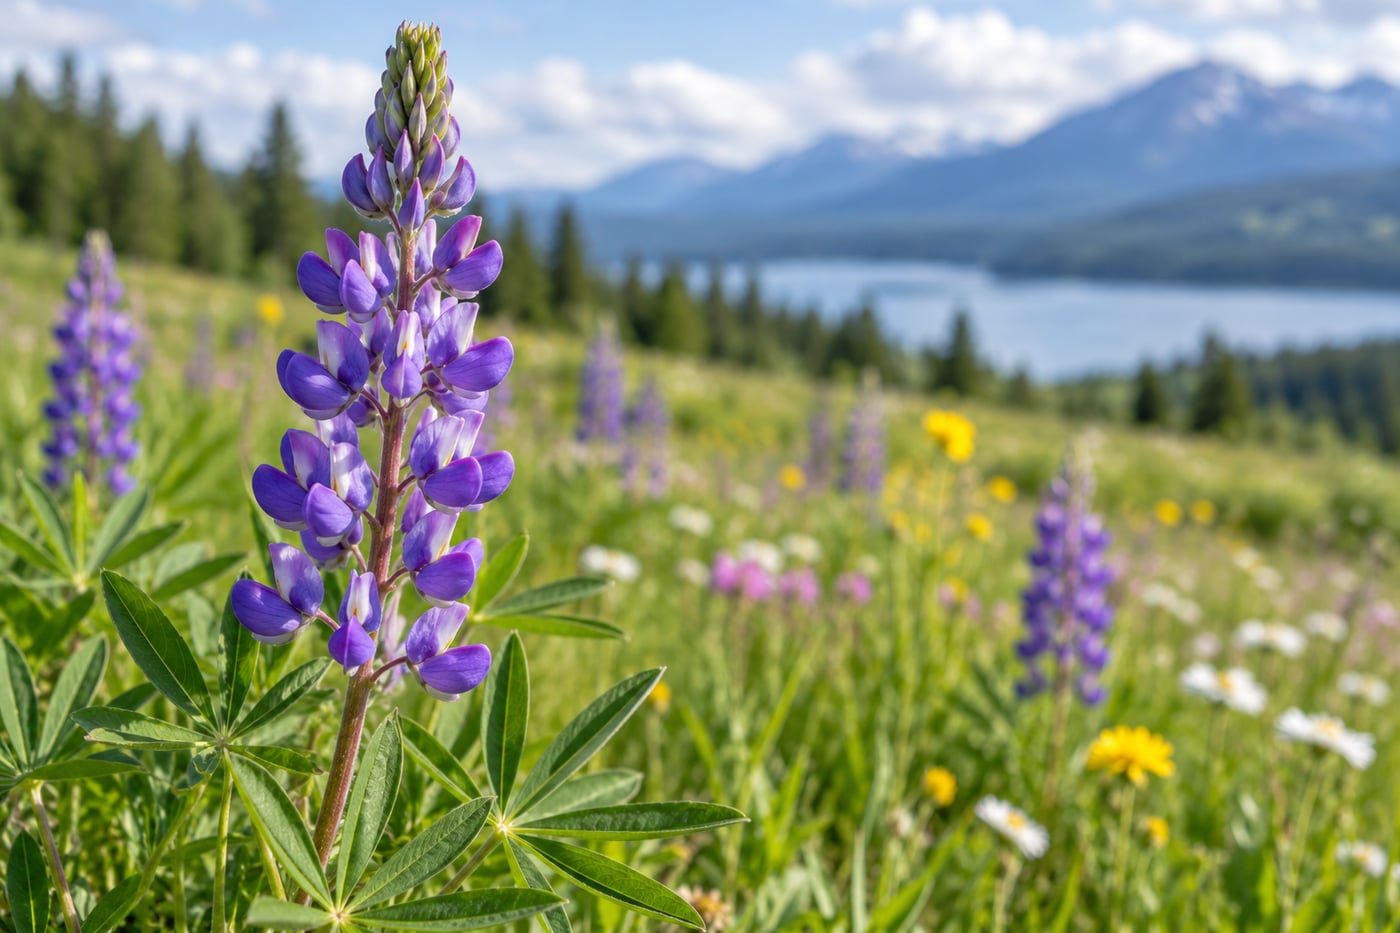
    Sharp purple flower against a softer meadow background
    AI-generated teaching illustration. It shows the scene discussed here, not a measured camera test.

    What aperture changes

    The f-number controls the lens opening. A lower number means a wider opening, which lets in more light and can produce a shallower depth of field. A higher number means a smaller opening, which lets in less light and can keep more of the scene acceptably sharp. Depth of field also depends on focus distance, focal length, and the camera format. Two photographs at the same f-number can therefore look different.

    A wider aperture can help separate a portrait from a distracting background. It can also make focusing less forgiving, especially at close distance. If the subject turns slightly, an eye that was sharp may no longer be. For a group, a very wide aperture may leave one person sharp and another soft. Stop down a little or arrange people on a similar plane, then check the result.

    A narrower aperture is often useful when several distances matter, such as a flower close to the camera and a landscape behind it. It does not make every part of the scene sharp automatically. Focus distance still matters, and very small openings can reduce fine detail through diffraction. Use a test frame and view it at the size that matters for your work.

    The shutter speed still matters

    The camera can select a shutter speed that gives the correct average brightness but is too slow for movement. A still building may remain sharp at a speed that blurs a walking person. A child running towards the camera usually needs a faster shutter than a person sitting still. Handheld camera movement can soften the whole frame, while subject movement often blurs only the moving parts.

    When the speed is too slow, consider raising ISO, opening the aperture, adding light, or changing position to support the camera. Each choice has a cost. Raising ISO can make noise more visible; opening the aperture reduces depth of field; adding light may change the look of the scene. Stabilisation can help with camera shake but does not freeze a moving subject.

    Set Auto ISO with a purpose

    Auto ISO can let the camera raise sensitivity when the light falls, helping it maintain a more useful shutter speed. Many cameras offer an upper ISO limit and, on some models, a minimum shutter speed. Read the camera menu carefully because the options differ. A focal-length based minimum may adapt to the lens, but it still may not account for a fast-moving subject.

    Set a starting limit that you are comfortable using, then test it in the kind of light you photograph. If the camera reaches the limit, it may choose a slower shutter than your chosen threshold. Look at the exposure information after each test. A setting that works for a still interior may be too slow for a child or pet.

    Watch for exposure limits in bright light

    In bright sun, a wide aperture and low ISO may still require a shutter speed faster than the camera can provide. Some cameras display a warning or blink the shutter value. Narrow the aperture, lower ISO if possible, or use appropriate light control. A neutral density filter can reduce incoming light in some situations, but know how it affects exposure and autofocus on your camera.

    Flash adds another constraint. Cameras have a maximum sync speed for many flash setups, and high-speed sync is not available with every flash or camera. Check the camera and flash manuals before relying on a particular combination. Aperture priority does not remove those limits.

    A short practice session

    Place a stationary subject near a background with some distance behind it. Use steady daylight so the light does not change much during the comparison. Set A or Av, choose a fixed ISO for the first round, and make one frame at a moderate aperture, one wider, and one narrower. Keep your position and focus point the same.

    Compare the background blur and check the subject’s important details at full size. Then make another round with Auto ISO enabled. Watch the shutter speed and ISO for each frame. You are learning two things: how the aperture changes the appearance of the scene, and how the camera adjusts exposure around your choice.

    Repeat with a person who moves slightly. Your still-subject results will not tell you which shutter speed will freeze a gesture. Make a few frames at different apertures and inspect the eyes and hands. Choose a depth of field that suits the subject, then make sure the shutter speed is adequate for its movement.

    When to switch modes

    Aperture priority is handy when depth of field is your main concern and the camera has room to choose a suitable shutter. Switch to shutter priority, often marked S or Tv, when motion blur or freezing action is the priority. Manual exposure can be useful under steady light when you want fixed control over both values. No mode can make the decision for you when the scene changes quickly.

    If the photograph is too bright or dark, check the meter and exposure compensation. A scene with lots of snow or a large dark background can fool a reflective meter because it tries to render the scene near a middle tone. Learn the adjustment in How to Use Exposure Compensation When Your Camera Gets Brightness Wrong.

    A quick pre-shutter check

    • Is the chosen aperture suited to the depth of field you want?
    • Is the camera’s shutter speed suitable for handholding and subject movement?
    • Is Auto ISO enabled and limited in a way you understand?
    • Are important highlights or shadows at risk of losing detail?
    • Did focus land on the part of the subject that matters?

    After taking the frame, review it and make one adjustment at a time. If you open the aperture, check both depth of field and the new shutter speed. If you raise ISO, check whether the shutter became fast enough. This small habit makes the mode predictable and helps you understand why a photograph changed.

    Related lessons

    Sources and further reading

    Nikon: aperture and exposure basics.

  • How to Use Exposure Compensation When Your Camera Gets Brightness Wrong

    Published: Updated:

    You photograph a white wall in daylight, and the camera makes it look grey. Or you photograph a dark jacket, and the image comes back brighter than the scene felt. The meter has estimated an exposure from the light it sees. That estimate may need a small correction, and exposure compensation gives you a quick way to make one when the camera is choosing exposure for you.

    The control is usually marked with a plus and minus symbol. Positive values ask for a brighter result; negative values ask for a darker one. The adjustment is measured in exposure values, often called stops. A one-stop change is substantial, so make a small move first and check the result. Button names and behaviour vary across cameras, so use your manual to locate the control and learn how your model displays its setting.

    Check your exposure mode first

    A camera mode that is choosing part of the exposure. The examples assume the camera is metering the scene and can change a setting in response to compensation. Before comparing frames, check which values actually moved and whether a shutter-speed, aperture, or Auto ISO limit was reached. Fully manual exposure with fixed ISO may behave differently; consult your camera manual.

    White bowl and folded linen with visible highlight texture
    AI-generated teaching illustration. It shows the scene discussed here, not a measured camera test.

    Why the meter can look wrong

    A reflective meter measures light coming back from the scene. It does not know that the large bright area is snow, a white wall, or a pale dress. It also does not know that a dark coat should remain dark. Depending on framing and metering pattern, the camera may steer these scenes towards a middle brightness. The result can look different from what you saw.

    The meter has not necessarily malfunctioned. It is making an estimate from reflected light, and some subjects do not fit the assumptions behind that estimate. Exposure compensation lets you adjust the camera’s target without switching out of a mode such as aperture priority or shutter priority.

    Start with a white or bright subject

    Try a white bowl or sheet of paper in steady daylight. Frame it so it occupies a good part of the view, set aperture priority, and take a photograph at zero compensation. Check whether the surface looks grey and whether its texture is visible. If it is too dark, try a modest positive adjustment, such as +0.7 EV, and take another frame.

    Compare both photographs on the camera screen or a computer. Look at the brightest textured area. If it has become featureless white, the adjustment may have gone too far. Reduce it until the surface looks bright while retaining the detail you care about. A small reflection can clip without harming the image, but broad areas of lost texture may matter.

    Snow can be another useful practice subject, but it is not a reason to apply the same fixed value every time. Light, background, and metering pattern change the result. Make a test exposure, inspect it, and adjust based on the actual photograph.

    Try negative compensation with a dark scene

    Place a dark coat or object against a neutral background and make a frame at zero. If the camera has lifted the scene until the dark subject looks washed out, try a small negative adjustment. Watch whether the material still shows texture. The aim is not always to make the image darker; it is to bring the rendered brightness closer to the photograph you intend.

    Backlit subjects require another kind of judgement. A face in front of a bright window may appear too dark if the camera gives weight to the window. Positive compensation can brighten the face, though the window may lose detail. If both areas matter, consider changing the light or position, using fill light, or making multiple frames for later blending when appropriate.

    Know what the camera changes

    In aperture priority, the camera often changes shutter speed when you dial compensation. If Auto ISO is active, ISO may change too. In shutter priority, aperture or ISO may move. In a program mode, the camera can adjust more than one setting. Compensation changes the target exposure, but it does not guarantee a particular shutter, aperture, or ISO.

    Watch the values in the viewfinder or playback information. If positive compensation makes the shutter slower, a moving subject may blur. If it opens the aperture, the background may become less sharp. If ISO rises, image noise can become more visible. These effects depend on the camera’s settings and limits.

    In manual exposure with a fixed ISO, the meter may show that your selected settings are brighter or darker than its reference without changing the captured exposure. Some cameras allow exposure compensation to affect Auto ISO in manual mode. Behaviour differs across models. Check the meter scale and the manual instead of assuming the control works the same way in every mode.

    Use the histogram and highlight warning carefully

    The playback image is a useful first check, but screen brightness can make it misleading. A histogram shows how tones are distributed in the rendered preview. It can help you notice a strong shift towards the right or left, but it does not tell you whether the composition works or whether a particular highlight is important.

    Highlight blinkies, when available, show areas that may be clipped in the preview. The preview can be based on a JPEG rendering even when you shoot RAW. Treat it as a warning to inspect, not a perfect reading of every channel in the RAW file. Protect the details that matter in your photograph rather than trying to make a histogram look evenly centred.

    Exposure compensation is not a focus control

    If the subject is soft, changing compensation may only make a blurry image brighter or darker. Check where focus landed, whether the shutter speed was suitable for movement, and whether the camera moved during the exposure. If the image is sharp but the brightness is off, then compensation may be the right adjustment.

    When the camera chooses a shutter speed, a compensation change can affect motion. A brightening adjustment might slow the shutter, depending on mode and available settings. Recheck speed for people, pets, and handheld telephoto shots. For mode-specific guidance, see Aperture Priority: What to Check Before You Press the Shutter.

    A repeatable three-frame exercise

    Choose a still subject with a bright or dark area that you want to render carefully. Keep the light and framing steady. Take one frame at zero, one at a small positive value, and one at a small negative value. For example, compare 0, +0.7, and −0.7 EV. Avoid large changes until you see how the camera behaves.

    For each frame, note shutter speed, aperture, and ISO. Then compare the subject’s brightness and its texture. This separates the visual change from the camera’s method of making that change. Repeat with a backlit face, white object, and dark object. You may find that each scene needs a different correction, or no correction at all.

    Remember to reset it

    Exposure compensation often remains active after you take a picture. A positive setting that helped a backlit portrait can make the next evenly lit scene too bright. A negative setting used for a bright reflection can unexpectedly darken a person indoors. Check the compensation indicator when the exposure looks surprising, and return it to zero when you no longer need the adjustment.

    Some cameras reset compensation when switched off; others retain it. Do not rely on memory or assume a universal behaviour. Add the indicator to your regular pre-shot check, especially when changing from one type of scene to another.

    When compensation is not enough

    If the subject and background differ greatly in brightness, a single exposure may not preserve detail in both. You could change your angle, wait for more even light, use a reflector or fill light, or expose for the part of the scene that matters most. A graduated neutral density filter or careful multiple exposure workflow may help in some landscape situations, but each has trade-offs.

    Use the simplest option that fits the photograph. Compensation is most useful when the camera is already close and needs a small nudge. If you repeatedly need a large adjustment, review the metering mode, exposure mode, light, and composition. A change in viewpoint can sometimes solve the problem more cleanly than a larger correction.

    Related lessons

    Sources and further reading

    Nikon D850 manual: exposure compensation (model-specific example).

© 2026 CaptureView. All rights reserved.