Category: Landscapes

Landscape photography lessons on composition, motion, changing light, and field technique.

  • How to Photograph Moving Water With Long Exposures

    Published: November 13, 2026 · Updated: November 13, 2026 · By Clara Whitmore, CaptureView contributor

    Long exposures turn moving water into a soft veil while rocks, shorelines, and other stationary details stay crisp. The effect is easy to recognize, but the useful shutter speed depends on the water, the light, and how much texture you want to keep. A stream does not need the same treatment as a waterfall or a calm inlet, and a very long exposure can erase detail that would have made the photograph feel connected to the place.

    This guide walks through a repeatable way to photograph moving water. You will learn what shutter speed changes, how to steady the camera, when a neutral-density filter helps, and how to judge the result in the field.

    What shutter speed does to moving water

    The shutter records movement over time. A fast exposure can freeze individual ripples and splashes. A slower one lets water travel across the frame while the camera records its path as a blur. The water itself does not become brighter because it is white; it becomes a longer trace in the image. The surrounding rocks and trees remain sharp only if the camera is stable and they are not moving.

    There is no single “correct” long-exposure setting. At 1/4 second, small ripples may soften while larger shapes remain distinct. Around one or two seconds, a steady stream can form ribbons. Exposures of several seconds can make a waterfall or tide pool look smooth, especially when the flow is even. These are starting points, not rules. A thin trickle may need a longer exposure than a fast, turbulent cascade.

    Choose a shutter speed before adding filters

    Start in shade, near sunrise or sunset, or on a cloudy day. Set the camera on a stable tripod and compose the frame before fitting a dark filter. Use a low ISO such as 100 or 200, choose an aperture that keeps the important parts of the scene in focus, and take a test frame at a shutter speed your camera can expose without a filter. Review the water texture at the same magnification each time.

    Try a short sequence rather than guessing one number: for example, 1/4 second, 1 second, and 4 seconds. Keep the framing, focus, aperture, and ISO fixed while comparing them. The shortest frame will usually preserve the most texture; the longest will simplify the surface. Choose the frame whose water supports the subject instead of automatically choosing the smoothest one.

    Keep the camera still

    Spread the tripod legs on firm ground and press each foot into the surface. On a wooden boardwalk, bridge, or soft mud, vibration can travel through the support. Keep the centre column lowered when possible. A strap can flap in wind, so tuck it away. If your camera has a mirror, use mirror lockup or electronic front-curtain shutter where appropriate. A two-second timer or remote release prevents a finger press from nudging the camera.

    Use a stable tripod head and check that the horizon has not shifted when you tighten it. Turn off stabilization when the camera is firmly mounted if the manufacturer recommends doing so; some modern systems detect a tripod, but behavior varies. On a windy bank, shorten the tripod, widen its stance, and shield it with your body without touching the camera during exposure. Avoid hanging a heavy bag if it swings in the wind.

    When a neutral-density filter is useful

    A neutral-density filter reduces the amount of light reaching the sensor, allowing a longer shutter speed in daylight. It is useful when a scene is bright and the shutter would otherwise be too short. A three-stop filter turns 1/30 second into roughly 1/4 second; a six-stop filter can extend that exposure much further. Exact exposure depends on the filter rating and your meter, so use the camera’s metering and check the histogram.

    Before fitting a strong filter, focus and compose. Some filters make it difficult for the camera to see the scene. If autofocus hunts after the filter is attached, remove it, focus on the intended area, switch to manual focus, and then install the filter. Watch for light leaks around the filter holder, vignetting at wide focal lengths, and color shifts from inexpensive or stacked filters. A lens hood or careful shading can reduce flare, but do not let it block the frame.

    Balance depth of field and exposure

    Do not choose the smallest aperture automatically. Very high f-numbers can soften fine detail through diffraction, while a wide aperture may leave near rocks or distant banks outside the focus range. Start around f/8 or f/11 for many landscape scenes, then adjust for the actual distance and depth you need. If the foreground is close, focus carefully and review both near and far details. A wider focal length can make depth of field easier to manage, but it also changes how large the water appears in the frame.

    If you use aperture priority, watch the shutter speed the camera selects. If you use manual exposure, use the meter as a starting point and inspect highlights on bright foam. A blink warning can show where detail is at risk, but a few small clipped highlights may be acceptable in direct reflections. Preserve texture in the surrounding scene before chasing a perfectly white stream.

    Work with different kinds of water

    For a fast waterfall, begin around 1/2 to 2 seconds if you want visible flow lines. For a broad, even cascade, a longer exposure may produce a continuous sheet. For a creek with separate channels and stones, try a shorter speed so the movement remains legible. At the coast, a few seconds can record the retreat of a wave as a translucent path, while a much longer exposure may flatten the surf and hide the shape of the shoreline.

    Wind matters on lakes and pools. A long shutter smooths the water only when the surface is relatively calm; wind can create streaks, broken patterns, or reflections that disappear. Those patterns may be the strongest part of the image. If trees or grasses move during a long exposure, they will blur too. Decide whether that movement helps the scene. Shorten the exposure, wait for a lull, or frame stationary surroundings if you want a crisp landscape.

    Check more than the preview

    After each frame, inspect the histogram and zoom into a stationary edge such as a rock or railing. A bright screen can make a poor exposure look fine outdoors. Look for tripod movement, filter flare, clipped highlights, and unwanted blur in branches. If the water is a featureless white patch, reduce exposure or shorten the shutter. If it looks too frozen, lengthen the exposure slightly. Change one setting at a time so you know what improved the frame.

    Protect yourself while working near water. Keep the camera bag on dry ground, avoid placing tripod feet where a wave can move them, and do not step backward while looking at the screen. A small change in viewpoint often improves a water photograph more than another filter: move lower to give the flow a path through the frame, or step sideways to separate bright water from a distracting background.

    A simple practice exercise

    Find a small stream or fountain in steady light. Make three frames at 1/4, 1, and 4 seconds from the same tripod position. Keep focus, aperture, and ISO unchanged. Compare the shape of the water and the sharpness of the surroundings, then choose which version tells you most about the place. Repeat with a different angle and with a faster or slower section of flow. The exercise makes shutter speed a deliberate choice rather than a recipe.

    Once the water texture feels right, make a second composition that includes more context: the bank, a rock pattern, or the direction the stream travels. Long exposure is a visual tool, not the subject by itself. The strongest frame usually gives the softened water a clear route through the photograph and leaves enough fixed detail for the viewer to understand what they are seeing.
  • How to Photograph Landscapes on a Windy Day

    How to Photograph Landscapes on a Windy Day

    Published: Updated:

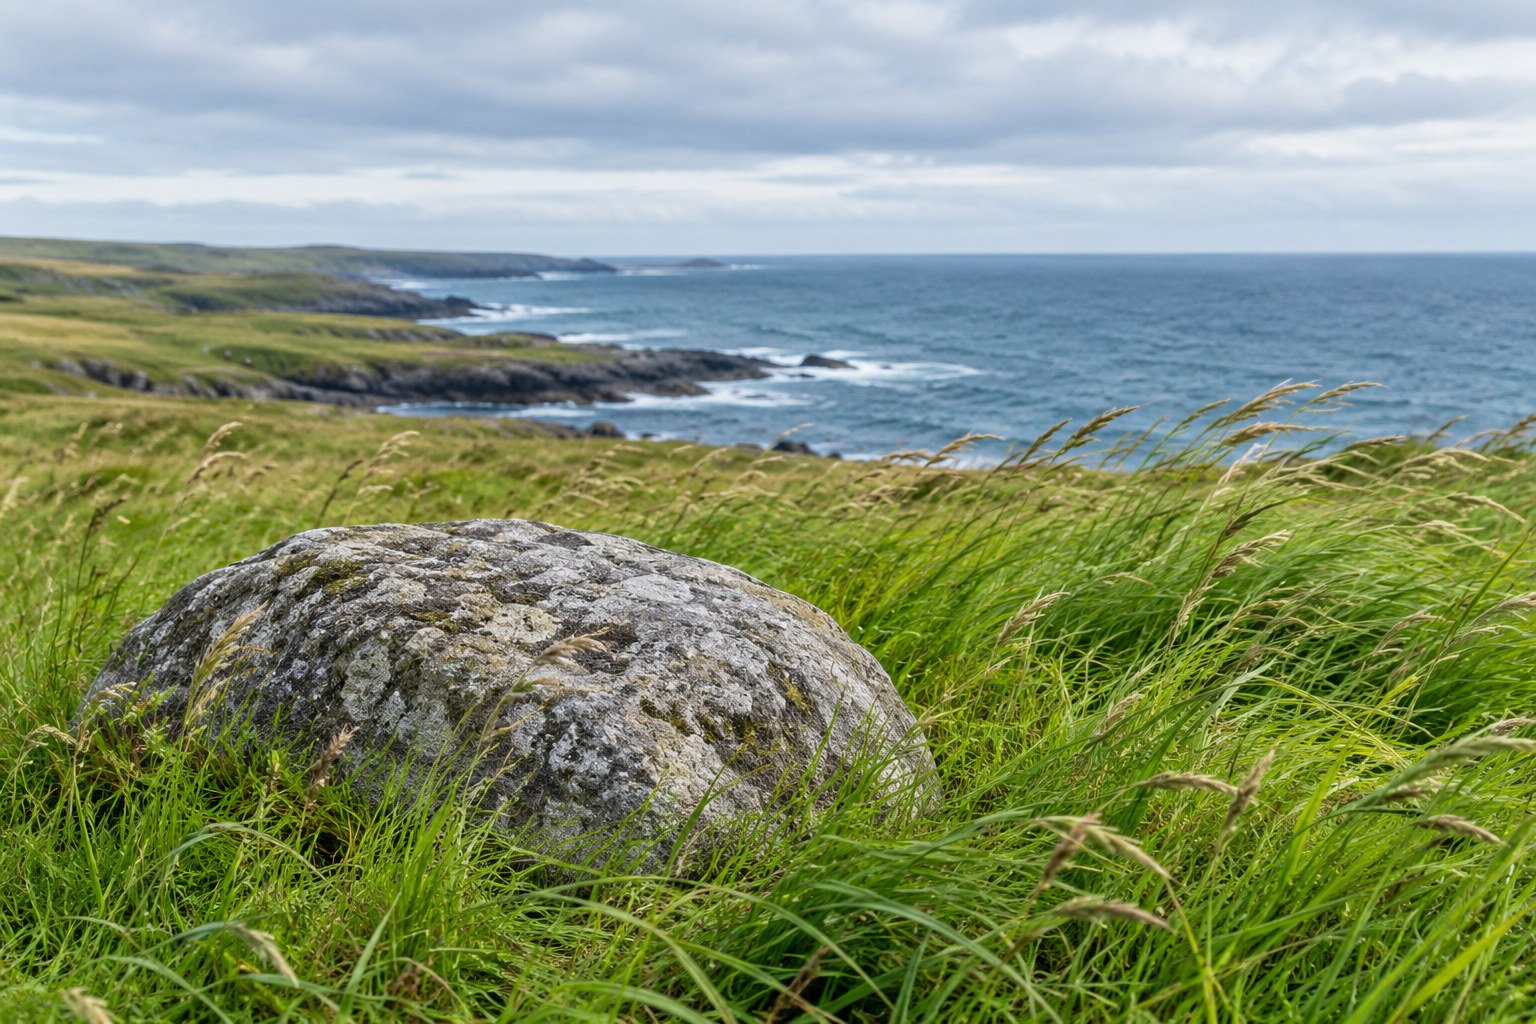
    The rocks look sharp, but the grass in front of them is a soft green smear. The camera was on a tripod, so it is tempting to blame focus. Look at what moved: the tripod held the camera still while the wind moved the grass during the exposure.

    Check whether the camera is moving, then decide whether you want the foliage sharp or blurred. Secure support helps with camera movement; shutter speed controls how much moving foliage blurs. If gusts affect your balance or the support will not stay secure, pack away.

    Solid grey foreground rock surrounded by windblown coastal grass with sea beyond
    Use the rock as a fixed reference when inspecting the moving grass. This illustration shows the scene, not a measured shutter-speed comparison. AI-generated teaching illustration.

    Decide what you want the wind to look like

    For a clear record of leaves, flowers, or foreground grasses, aim for a short enough exposure to limit their movement. If you want the weather to feel present, allow some foliage to blur against a still rock or tree trunk. Neither treatment is automatically better.

    The difficult middle ground is accidental blur: the main subject looks slightly soft without a clear sense of motion. Make a deliberate comparison between a clearly faster frame and a clearly slower one. Small changes may not show you the difference you need.

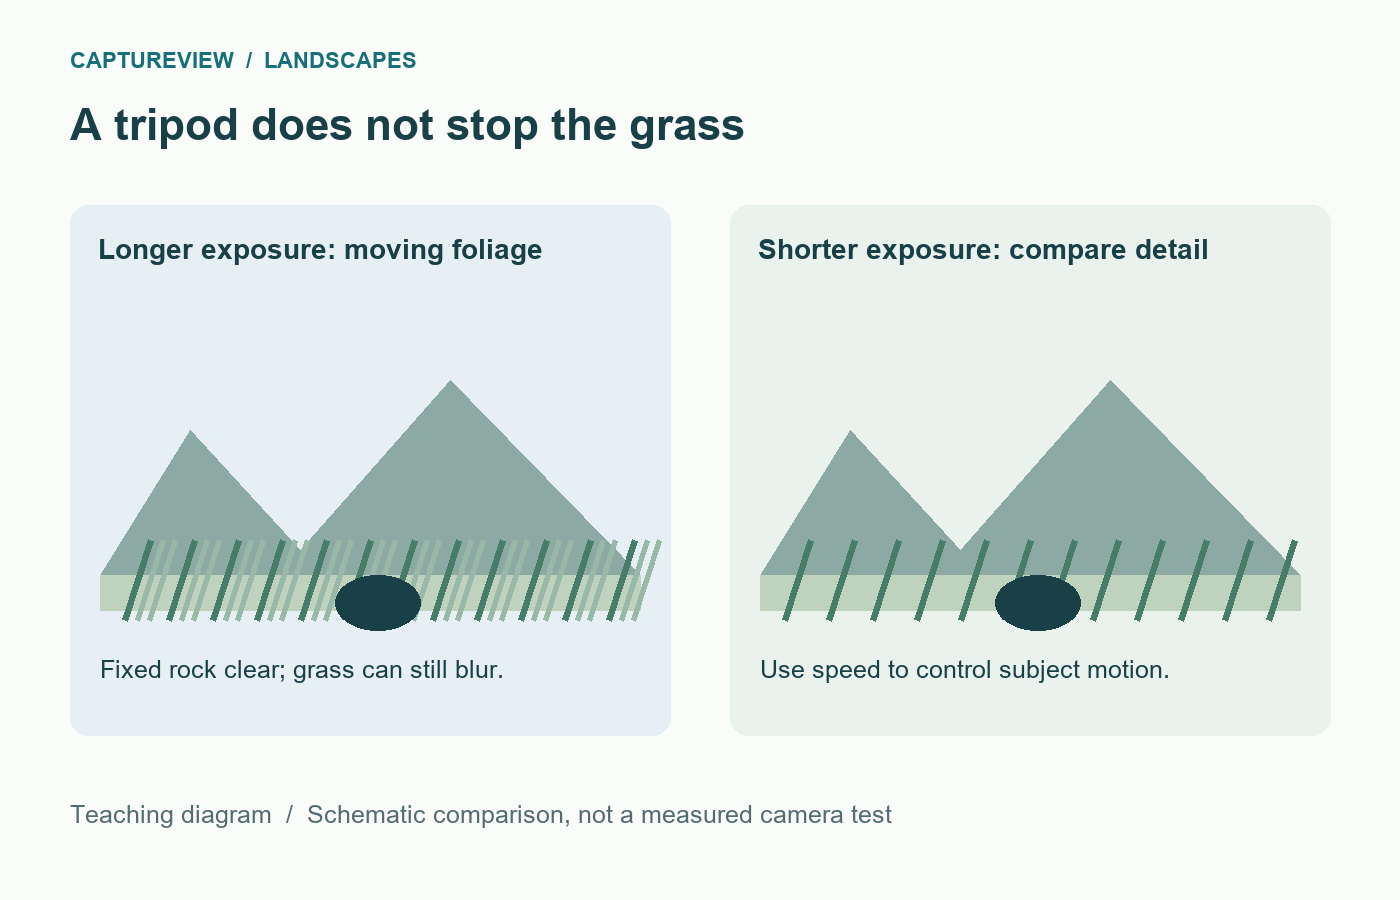
    Windy landscape diagram comparing blurred grass and clearer grass while a fixed rock remains sharp
    The rock provides a fixed reference. A tripod can steady the camera while grass continues to move during the exposure.

    Inspect something that cannot sway

    In playback, magnify a rock, a building edge, or a substantial tree trunk. Then inspect the foliage. If the fixed detail is clear and the leaves trail, subject movement is the main issue. If both smear in a similar direction, check camera movement and support before changing focus.

    Sturdy tree trunk surrounded by thinner leaves and branches in a breeze
    Compare the stable trunk with the finer foliage. Camera support and shutter speed address different sources of movement. AI-generated teaching illustration, not an exposure test.

    If the fixed detail is soft but a different distance is sharp, revisit focus and depth of field. Work through where to focus in a landscape rather than narrowing the aperture automatically. Several problems can occur in one frame, so examine more than one area.

    For crisp foliage, shorten the exposure

    Try 1/500 second as a test when nearby grass is moving noticeably. This is a comparison point, not a universal minimum. Tiny distant leaves, large nearby flowers, focal length, wind speed, and the final display size all change what looks sharp. Take a frame, magnify the important detail, and adjust from there.

    If you were using 1/60 second at f/8, moving to 1/500 second costs roughly three stops of light. Keeping f/8 would require about eight times the ISO for similar brightness, assuming the light stays steady. A frame at ISO 100 would become roughly ISO 800. Those numbers are illustrative; check your actual meter and highlight warnings.

    You can also open the aperture, but only as far as the required depth of field allows. Raising ISO may be a more useful compromise than losing the foreground detail you wanted. Do not insist on the lowest ISO when the subject movement is already ruining the frame.

    Make a tripod less vulnerable to gusts

    Use firm ground, spread the legs securely, and keep the centre column low when possible. Check that the head and leg locks are tight. A tall, lightly extended setup catches more wind than a compact one. Remove a loose strap from the wind when you can do so safely.

    A hanging bag can become a pendulum. If your support is designed for added weight, use the manufacturer’s guidance and avoid leaving a load free to swing. Do not improvise a heavy attachment that might pull the equipment over.

    Use a short self-timer or a release to avoid pressing on the camera during a supported exposure. That removes your touch, not a gust. Follow the camera or lens manual for tripod stabilisation settings; different systems behave differently.

    Wait for a lull, then check the result

    Watch the part of the scene you care about. Grass may pause briefly between gusts even while distant treetops keep moving. Make a short sequence around that lull and choose by detail, rather than holding the shutter continuously and assuming one must be sharp.

    Clouds can change the light at the same time. Recheck exposure when a bright gap opens. A successful earlier setting may now clip the sky or leave the foreground much darker. Avoid changing every setting at once; know whether you are correcting brightness, motion, or depth of field.

    If you choose to show movement

    Keep one reliable visual anchor, such as a rock or a sturdy trunk. With the camera supported, compare exposures such as 1/4 second and one second when light allows. The amount and direction of blur depend on the plants and the gust. A neutral-density filter can permit longer exposures in bright light, but you do not need one just to practise in dimmer conditions.

    Moving foliage makes exposure blending and focus stacking more difficult. Adjacent frames may no longer line up in those areas. For a beginner, a single well-chosen exposure is often a cleaner starting point than a complicated blend with ghosted leaves.

    Change the subject when conditions demand it

    A low viewpoint that includes moving grass may be less useful than a tighter frame of rocks, a sheltered detail, or a distant hillside. Recompose rather than fighting every gust. The horizon-placement lesson can help you remove an unhelpful foreground without making the sky accidental.

    Small ferns beside a mossy stone step in sheltered woodland
    A tighter sheltered detail can be a useful alternative when gusts spoil an exposed view. Keep enough surrounding stone to explain the setting. AI-generated teaching illustration.

    Stay clear of unstable trees, exposed edges, and rough water. If gusts affect your balance or the support will not stay secure, pack away and return in different conditions. Keep a note of the shutter speed that worked and whether the blur came from the camera or the scene. That distinction is useful on the next windy day.

    Sources and further reading

    Nikon: capturing or freezing motion explains shutter-speed choices. The settings in this lesson are test points to adapt to your scene, not measured guarantees.

  • Where to Place the Horizon in a Landscape Photo

    Published: Updated:

    A dramatic sky can fill most of a landscape. On a cloudless day, the same amount of sky may leave the photograph feeling empty. Horizon placement starts with what is interesting in the scene, then asks how much room that subject needs.

    Decide what the scene is about

    Start with a visible horizon and one subject. Decide whether the photograph is mainly about the sky, the land, or their relationship before moving the horizon. Reflections and symmetrical scenes may support a centred placement. Check that a small camera tilt has not made water or a distant shoreline look unintentionally slanted.

    Coastal horizon beneath clouds with grass in the foreground
    AI-generated teaching illustration. It shows the scene discussed here, not a measured camera test.

    Give space to the part carrying the photograph

    If cloud shape and light matter, try a lower horizon. If textures, a path, or reflections in the foreground matter, try a higher one. A thirds grid is a convenient comparison point. It gives you a place to begin, not a coordinate you have to obey.

    Make two frames before settling on one. A lower horizon can make distant hills feel smaller and open more sky above them. A higher one may bring the viewer into the foreground. Look at the actual balance of your scene: a small patch of bright cloud can attract more attention than a much larger area of dark ground.

    Try turning off the grid for a moment and ask what you noticed first when you looked at the scene. Then turn it back on and see whether a grid line helps you position the horizon. This keeps the tool in its proper role. The grid can help you compare a composition, while your subject and the light decide whether that comparison works.

    A centred horizon can work

    Symmetry and reflections sometimes benefit from a central division. Moving the horizon away from the centre just to follow a rule can weaken that balance. A calm lake that reflects a mountain may need similar room above and below the shoreline. If small ripples distort the reflection, the upper half may need more space so the mountain remains the subject.

    Check whether the two halves have a meaningful relationship. A reflection with strong detail is different from a large blank area that happens to be symmetrical. A centred horizon can also make a useful frame when the sky and land carry equal weight, as in a line of storm clouds over a patterned field.

    When you use a central horizon, keep the camera level and inspect the line carefully. A small tilt becomes easy to see when the horizon divides the photograph in half. If the subject is not symmetrical, consider moving the horizon a little higher or lower rather than forcing a perfect midpoint.

    Separate placement from level

    You can choose a high horizon and still accidentally tilt it. Use a camera level or grid if available, then inspect the scene itself. A sloping hillside is not a horizontal reference; a calm distant waterline may be more useful. In a coastal scene, waves close to the camera can slope as they meet the beach, so compare the distant sea line rather than the edge of the foam.

    If you straighten the photograph in editing, the crop can remove useful detail from the corners. Leave a little margin when the framing allows it, but avoid relying on a large correction for every frame. When the horizon is hidden by trees or buildings, check vertical structures and the general balance of the scene instead of inventing a straight line that is not visible.

    Turn on the grid before the exposure if your camera offers one. Some cameras show a level indicator in the viewfinder or on the screen. These aids can save time, though they do not choose the right height for the horizon. Review the image at normal size after capture; tiny alignment marks can be hard to judge while you are still composing.

    Check what crosses the horizon

    A tree, person, or building can become difficult to read when its outline merges with a distant ridge. Move a little or change camera height to separate them. A small shift can place the mountain line below a person’s shoulder or move a branch away from the edge of a building.

    A lower viewpoint may put a person against the sky. A higher viewpoint may put them against land. Compare which background gives the clearer outline. If the subject is a lighthouse or a tree, watch for the horizon cutting through its most recognisable part. The horizon can stay in the same place while your camera shifts sideways to improve that separation.

    Check the frame edges as well. A horizon that enters the image at one height and leaves at another may be intentional when the land slopes. If the slope is not part of the scene, level the camera before taking another frame. Look for poles, roofs, or bright gaps that touch the horizon and create distracting tangencies.

    Check whether the foreground adds useful detail

    A high horizon exposes a larger foreground area. More foreground does not automatically create depth if it is unrelated or messy. Choose a detail that belongs, such as a line of rocks, a path, or a patch of grasses, or tighten the composition so less empty ground remains.

    For a close foreground, inspect near and far sharpness. Read landscape focus choices rather than assuming horizon placement solves depth of field. Moving the horizon changes how much ground appears; it does not move the focus plane or make nearby and distant details equally sharp.

    Consider the camera height before changing the lens. Raising the camera can reveal more ground and move the horizon lower in the frame. Lowering it can hide a cluttered foreground and open more sky. Keep the camera secure, especially near water or on uneven ground, and do not step into a hazardous area to reach a particular viewpoint.

    Use a three-frame comparison

    Choose one safe position and photograph the same scene three times. Put the horizon low in the first frame, near the middle in the second, and high in the third. Keep the focal length and camera height steady so the horizon placement is the main change. If you move the camera up or down, make a separate set and note what changed.

    Compare the frames at the same display size. Ask which one makes the subject easiest to notice, whether the sky or land has too much empty space, and whether a foreground detail helps lead into the scene. A close crop can make differences look stronger, so first view all three as complete photographs.

    1. Choose the main subject and the part of the scene that supports it.
    2. Use the grid as a guide for a low, central, and high horizon.
    3. Check the horizon level, frame edges, and anything that overlaps the subject.
    4. Compare the photographs at the same size before choosing a crop.

    If one frame looks stronger only after a heavy crop, repeat the exercise with a slightly tighter starting composition. If none works, move sideways or change camera height and make another set. The aim is to see how the scene changes, not to prove that one grid position is always best.

    Related lessons

    Sources and further reading

    Adobe: symmetry and balance.

  • Where Should You Focus in a Landscape?

    Published: Updated:

    A landscape can contain rocks a metre from the camera and hills kilometres away. Focusing on the hills does not guarantee sharp foreground rocks. Focusing on the nearest rock does not guarantee sharp hills either.

    Choose a scene you can compare

    A static landscape with detail at different distances. This lesson assumes the camera position is stable and the scene has near and distant details to inspect. Compare the original files at the same magnification, not differently cropped previews. Moving foliage, water, and wind can introduce blur even when your focus choice is sensible.

    Foreground rocks and a distant ridge across an alpine meadow
    AI-generated teaching illustration. It shows the scene discussed here, not a measured camera test.

    Choose the details that matter, then check whether your settings keep them sharp enough for the final photograph.

    Start with the distances in your frame

    A scene without a very close foreground is usually easier to manage. At a moderate aperture, focusing on an important middle-distance feature may give a useful result. A close flower or rock changes the problem because it demands more depth of field.

    There is no universal “focus one third into the frame” rule. A third of the picture’s height is not a measurement of subject distance, and two scenes with similar framing can have very different distances.

    Use a moderate aperture first

    On many cameras, f/8 is a reasonable starting point for a broad daylight scene. It is not a guarantee. Make a frame, then magnify a near detail and a distant detail in playback.

    If the important areas are not sharp enough, try a narrower aperture and repeat the comparison. Very small apertures can reduce fine detail through diffraction. Whether the trade-off is worthwhile depends on the camera, output size, and scene.

    Change the frame when depth of field is insufficient

    Sometimes the easiest fix is to move the camera farther from the foreground or remove the closest object from the composition. This reduces the distance range you need to cover.

    Before considering a complicated technique, ask whether that foreground object improves the photograph. A sharp object at the bottom of the frame is not useful merely because it is close.

    Keep movement separate from focus

    A tripod steadies the camera. It does not stop wind-blown leaves or flowing water. If those details need to look still, choose a faster shutter and raise ISO if required.

    For still scenes with a long exposure, use stable support and a timer or remote release. Check your manual for stabilisation behaviour on a tripod.

    When focus stacking may help

    For a stationary scene, several frames focused at different distances can be combined in compatible software. This is called focus stacking. It takes more care than a single frame: camera position and exposure should remain consistent, and moving plants or water can create blending problems.

    Inspect a single frame before deciding whether the scene needs stacking.

    A field check you can repeat

    1. Identify the nearest and farthest details you want sharp.
    2. Choose a moderate aperture and an initial focus distance.
    3. Make a frame and magnify both areas.
    4. Adjust focus, aperture, or composition, then compare again.

    See depth of field basics and the landscape practice lesson for the related controls.

    If only the foliage is soft, check for wind movement. Compare a moderate aperture if a very small one makes the whole frame softer. In a stacked file, inspect moving water and leaves for blending errors, even when the individual frames look plausible.

    Related lessons

    Sources and further reading

    Nikon: aperture and depth of field.

© 2026 CaptureView. All rights reserved.