
The front row looks sharp, but the people behind it look soft. Before changing focus modes, look at how far apart the rows are. A group spread across several distances asks more of your depth of field than a group arranged in a shallow space.
For a small, fairly still group in daylight, start by bringing the rows closer together. Try f/5.6 or f/8 if your camera allows aperture control, check the shutter speed, and inspect faces in both rows. These are starting points for a test frame. The distance to the group and the depth of the arrangement decide whether they are enough.
Arrange the faces before choosing a focus point
Ask the back row to move forward, leaving enough room for everyone to stand comfortably. Place their faces in the gaps between the people in front. A seated front row and a standing back row can make this easier. Watch for someone leaning far forward or standing well behind the others.
Keep the group roughly parallel to the camera. If the line of faces runs diagonally away from you, one end is farther from the lens. Moving the camera toward the middle of the arrangement can reduce that difference. Leave a little space around the outside people so you can straighten or crop the frame later.
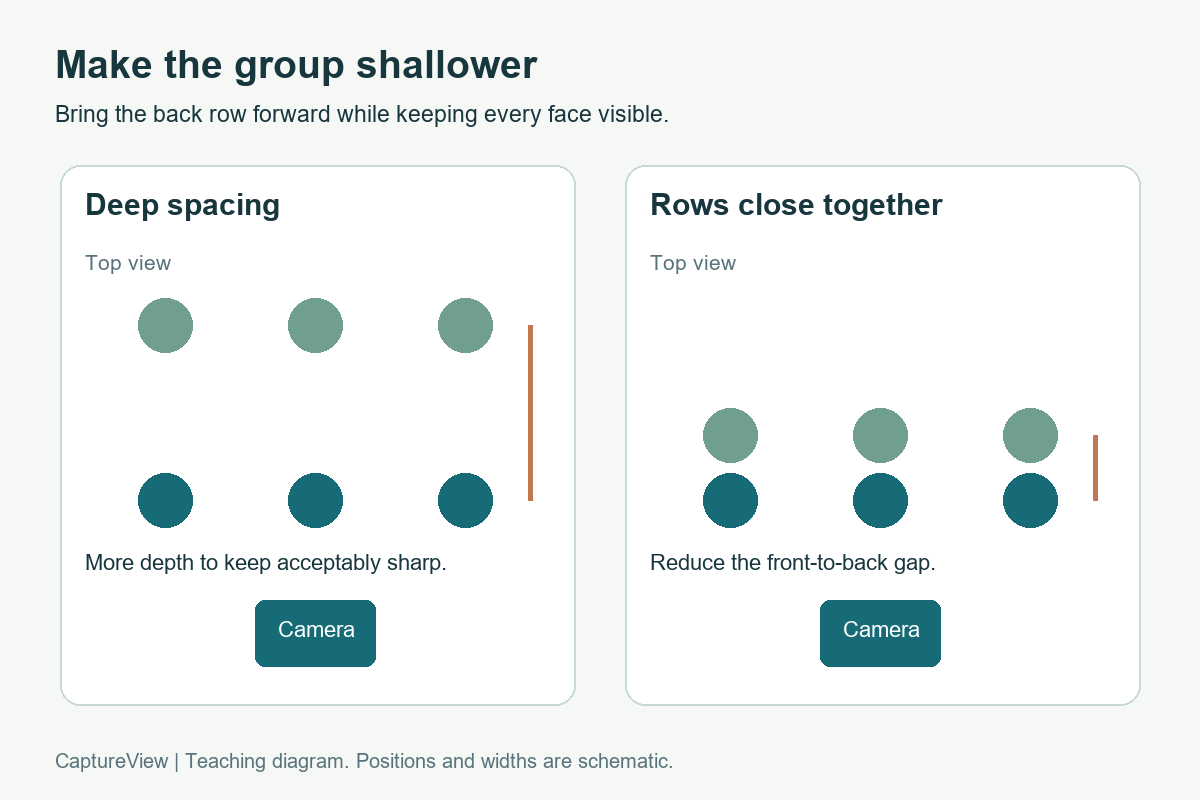
Use a position where you can see every face without asking anyone to balance on an unstable step. If a person’s eyes disappear behind someone else’s head, change the arrangement. A smaller aperture cannot reveal a hidden face.
Choose an aperture that covers the group
A wide aperture used for a single portrait may leave too little depth for two rows. Nikon’s portrait guidance also cautions that a very wide aperture can make the sharp zone too narrow. Start with a moderate aperture and judge the result at your actual shooting distance.
If a test at f/5.6 leaves one row soft, try f/8 while keeping the camera position steady. Check the shutter speed again after the change. In aperture priority, the camera may lengthen the exposure to compensate for the smaller opening. Auto ISO may help maintain a usable shutter speed, within the limits you set.
In a dim room, closing the aperture repeatedly can leave you with a slow shutter or a high ISO. Bring the rows closer, find better light, or reduce the depth of the arrangement before making another adjustment. Our exposure controls lesson explains how these settings affect one another.
Place focus deliberately and check the result
For a shallow two-row arrangement, begin with a clearly visible eye in the front row near the middle of the group. Take a test frame and compare that eye with a face in the back row. If the rear faces are soft, reduce the gap or use a smaller aperture and test again. A deeper arrangement may require a different focus distance; no single face is the right focus target for every group.
Eye detection can select one person reliably while the rest of the group falls outside the depth of field. Watch which eye the camera selects. If it keeps jumping to the wrong person, choose a smaller focus area or select the intended subject using the controls your camera provides.
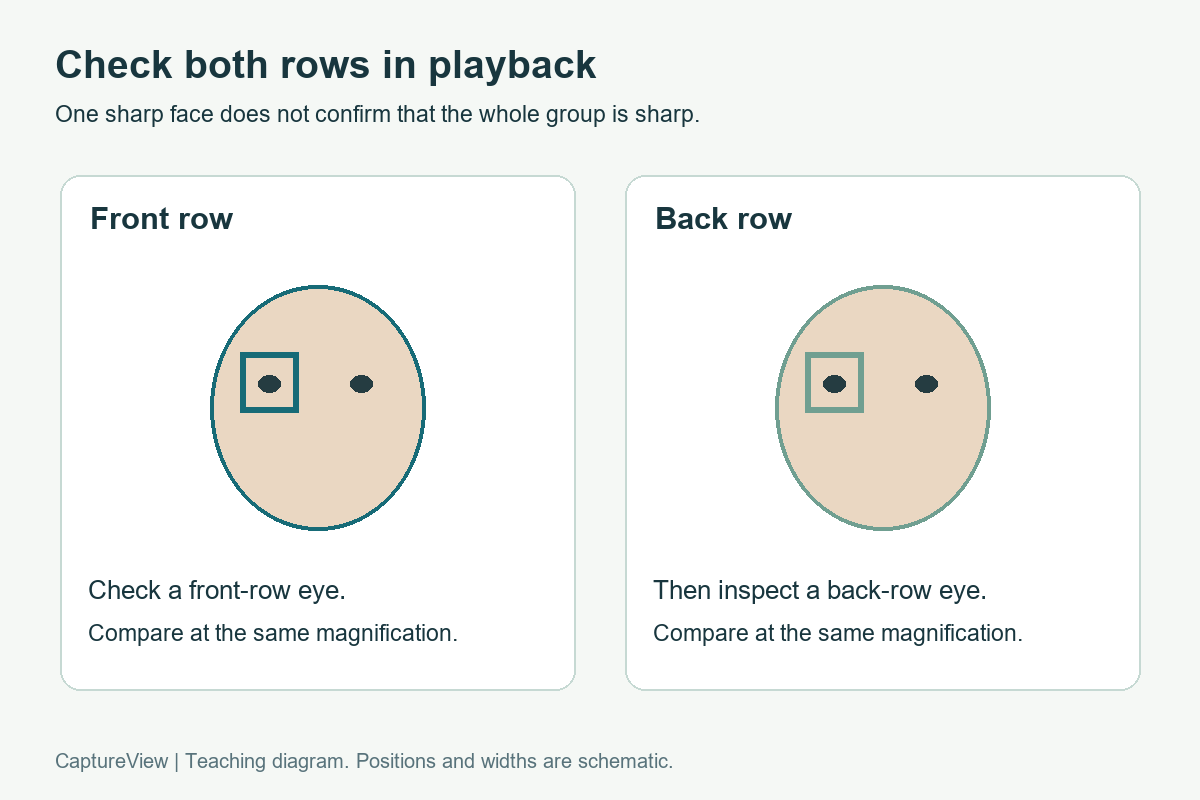
Avoid focusing on an eye and then making a large change to your camera angle. Put the focus area over the intended eye in the finished composition. If people sway or change position, focus again before the next frame.
Separate missed focus from movement
Look at a stationary detail near the faces, such as a collar or the bench. If that detail is sharp but a person’s face is smeared, subject movement may be involved. When every part of the frame has a similar directional smear, investigate camera shake as well as shutter speed. An out-of-focus face usually looks soft without one clear direction of movement.
For adults trying to hold still, 1/250 second is a reasonable first test in available light. Children, animated gestures, or a longer lens can call for a faster shutter. Raise ISO when necessary to keep the shutter speed you need. Stabilisation can reduce camera shake, but it cannot stop someone turning their head.
A short practice session with a small group
- Arrange two close rows in even light and make sure every face is visible.
- Take a test frame at f/5.6 with a shutter speed suitable for the people in front of you.
- Keep the framing and focus target steady. Take another at f/8, adjusting ISO if needed to preserve shutter speed.
- Inspect a front-row face, a back-row face, and the faces at both edges at the same magnification.
- If one row remains soft, bring the rows closer and repeat. Make several final frames to give yourself a choice of expressions.
Review before the group disperses. Check blinking eyes and hidden faces as well as sharpness. For help choosing the light, read our window-light portrait lesson. If shake is still affecting your photographs, work through the handheld sharpness exercise with a stationary subject first.
Scene photograph: AI-generated teaching illustration. Diagrams are schematic and do not report measured camera results.
Leave a Reply