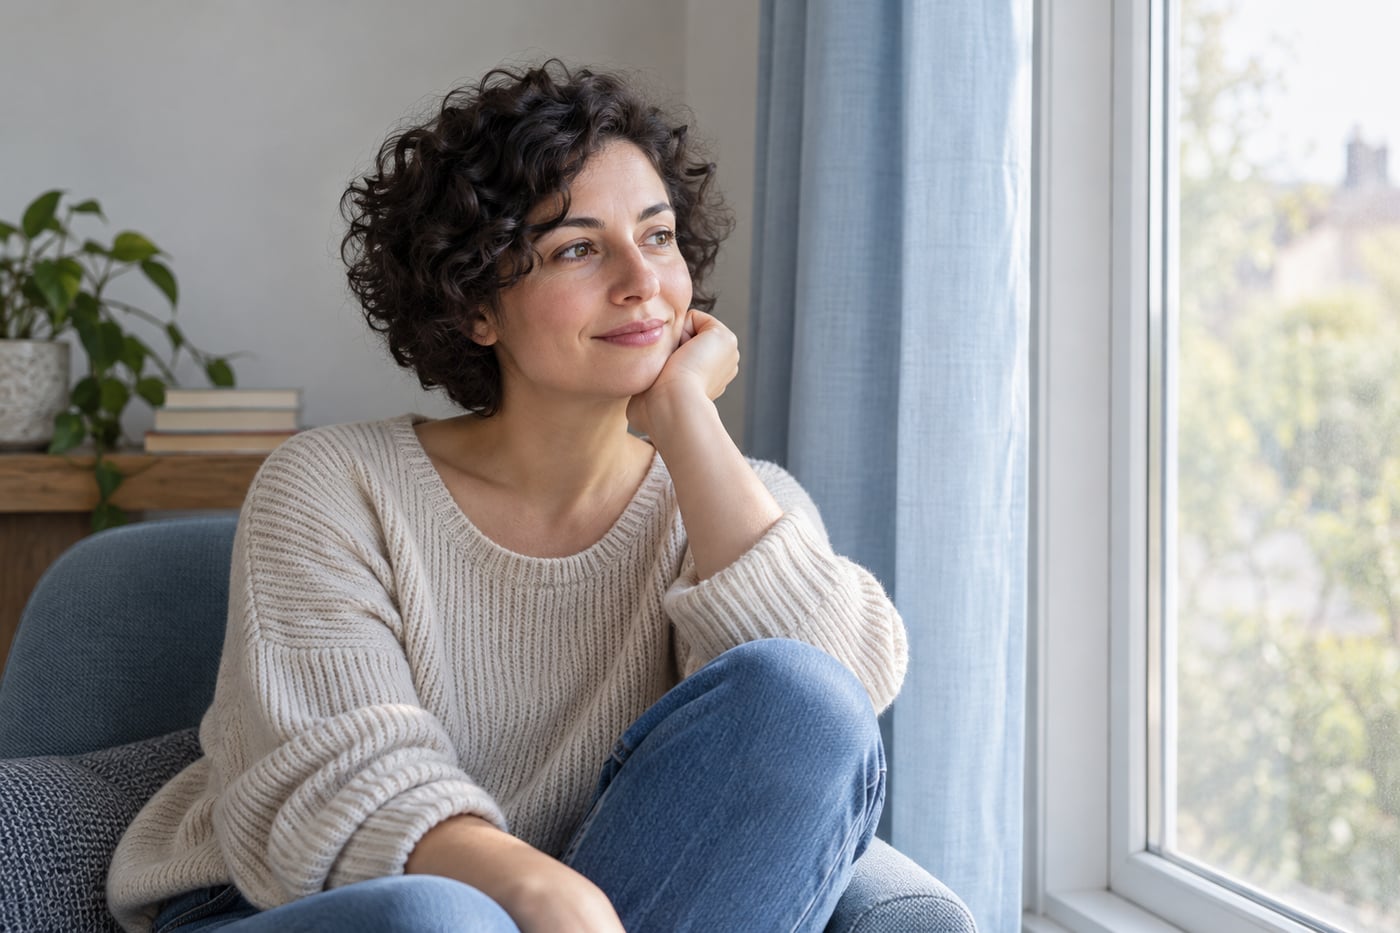
Category: Portraits

Portrait tutorials covering window light, focus, posing, and respectful photographing of people.

  • How to Use Window Light for Natural-Looking Portraits

    By Maya Ellery, CaptureView editorial pen name
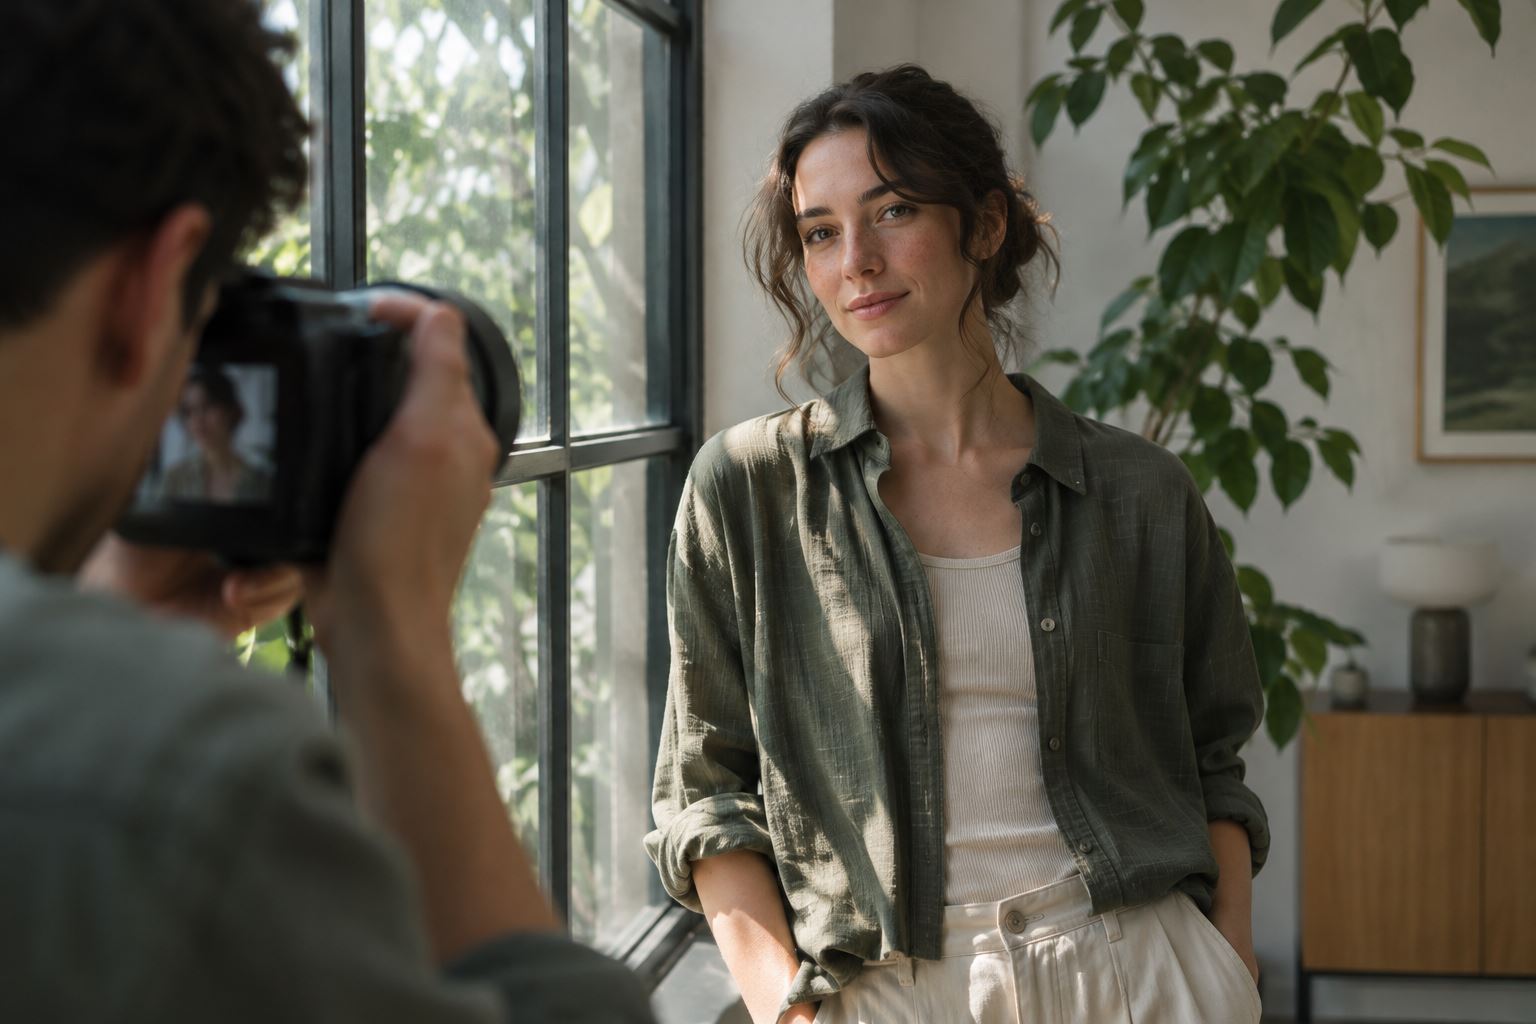

    A portrait subject near a large window with soft natural light
    Window light can create soft portrait shadows when the subject is placed thoughtfully.

    Window light is one of the easiest portrait setups to try at home. It is free, available in many rooms, and changes enough through the day to teach you how direction and distance shape a face. The trick is not to put someone beside any window and hope for flattering light. First look at the quality of the light, decide which side of the face should be brighter, and make small changes while watching the shadows.


    This guide walks through a repeatable setup for a natural-looking portrait. It uses a person, a window, and a simple reflector or pale wall. You do not need a studio flash or a fast lens. A phone camera works too, as long as you can tap to focus and keep the subject still.


    Choose a window with soft, steady light


    Start with a window that does not receive a hard beam of direct sun. On an overcast day, many windows produce broad, gentle light. If sunlight is coming straight through, try a different time of day or move the subject a little farther into the room. A thin white curtain can soften direct sun, but check that it does not add a strong color cast.


    Stand where the subject will sit and look at the window itself. If the bright sky fills most of it, the light is likely to be soft. If a sharp patch of sun falls on the floor or wall, it may create a bright stripe across the face. That can be a deliberate look, but it is harder to balance for a relaxed portrait.


    Turn the face toward the light


    Place the subject a few feet from the window, with the window about 30 to 60 degrees to one side of the camera. Ask them to turn their nose slightly toward the brighter side. This creates a small difference between the lit cheek and the shadow cheek, giving the face shape without making one side disappear.


    Take a test frame and inspect the eyes, nose, and cheek. A small highlight in the eye helps the portrait feel engaged. If the shadow side is too dark, turn the subject a little more toward the window or bring a white board, sheet, or pale wall opposite it. If the light looks flat, rotate the face a little away so the shadow becomes more visible.


    Set a comfortable distance and background


    Light becomes softer when it comes from a larger source relative to the subject. Moving close to a broad window often makes it feel larger. The subject can also move closer to the window for more light, but avoid pressing them against the glass; a little room allows natural posture and lets you place the camera.


    Check what sits behind the person. A plain wall, curtain, or tidy corner helps the face stay central. If the background is bright, the camera may darken the face to protect the window. Reframe so the window is outside the image, or tap the face on a phone to set exposure there. On a camera, use exposure compensation if the face is still too dim.


    Focus on the near eye


    For a head-and-shoulders portrait, focus on the eye nearest the camera. Use single-point autofocus or eye detection if it reliably selects the intended eye. With a phone, tap the eye and hold still for a moment after taking the picture. At a wide aperture, the depth of field can be shallow, so a tiny shift in the subject’s head may move the eye out of focus.


    Keep the shutter speed fast enough for small movements. A person breathing or speaking can soften a slow exposure, even if the camera is on a tripod. If the room is dim, raise ISO before accepting a shutter speed that produces motion blur. A little visible grain is often less distracting than an unsharp eye.


    Make the camera exposure look natural


    Use aperture priority if you want to control background blur while the camera chooses shutter speed. A moderate aperture such as f/2.8 to f/4 can soften a background without making focus unforgiving. On a kit zoom, choose the longer end of the lens and step back enough to frame the subject. If your lens does not open that wide, keep some distance between the subject and the background; that separation can make the background less prominent.


    Check the skin, not only the histogram. Bright window areas may clip, but a small area of featureless white outside the frame is not always a problem. The face should retain detail in both highlights and shadows. If the skin looks too bright, reduce exposure slightly. If it looks dull, add a little exposure or bring the face closer to the window.


    Give the subject something to do


    People can look stiff when they are told only to smile. Ask them to look toward the window, then back at you. Let them adjust a sleeve, turn a shoulder, or take a breath between frames. Photograph a short sequence rather than asking for one perfect pose. Watch for relaxed hands and a natural chin position.


    For glasses, turn the face a few degrees or raise the camera slightly to move reflections away from the lenses. Do not tilt the head so far that the pose feels uncomfortable. If the window reflection remains, shift your own position before moving the person; a small camera-side step often solves it.


    A five-frame practice routine


    1. Make one frame with the face toward the window.
    2. Rotate the face slightly away and compare the shadow.
    3. Move the subject farther into the room and note the change in brightness.
    4. Add white fill opposite the window, then remove it again.
    5. Review the near eye, skin highlights, background, and expression at full size.

    Change one thing at a time. If you move the subject, change the exposure, and swap lenses between every frame, it becomes difficult to tell which decision helped. Keep a note of the window direction and camera settings if you want to repeat the result on another day.


    When window light is not working


    A dark room may not offer enough light for a crisp portrait. Open another curtain, move closer to the window, or use a brighter room. A strongly colored wall can bounce tinted light onto the skin; place the subject near a neutral surface or correct the white balance afterward. Mixed light from a window and warm lamp can make one side of the face blue and the other orange. Turning off the lamp often produces a cleaner starting point.


    Window portraits are not supposed to look identical. The same room can feel calm in soft overcast light and dramatic in late-afternoon sun. Pay attention to where the light falls, make a test frame, and adjust the subject before reaching for complicated gear. Those small choices are what make the setup repeatable.


    Practice takeaway: Start with soft side light, focus on the near eye, and change only one part of the setup per test frame. You will learn more from five comparisons than from a long burst of unchanged shots.

  • How to keep both rows sharp in a group photo

    How to keep both rows sharp in a group photo

    The front row looks sharp, but the people behind it look soft. Before changing focus modes, look at how far apart the rows are. A group spread across several distances asks more of your depth of field than a group arranged in a shallow space.

    For a small, fairly still group in daylight, start by bringing the rows closer together. Try f/5.6 or f/8 if your camera allows aperture control, check the shutter speed, and inspect faces in both rows. These are starting points for a test frame. The distance to the group and the depth of the arrangement decide whether they are enough.

    Arrange the faces before choosing a focus point

    Ask the back row to move forward, leaving enough room for everyone to stand comfortably. Place their faces in the gaps between the people in front. A seated front row and a standing back row can make this easier. Watch for someone leaning far forward or standing well behind the others.

    Keep the group roughly parallel to the camera. If the line of faces runs diagonally away from you, one end is farther from the lens. Moving the camera toward the middle of the arrangement can reduce that difference. Leave a little space around the outside people so you can straighten or crop the frame later.

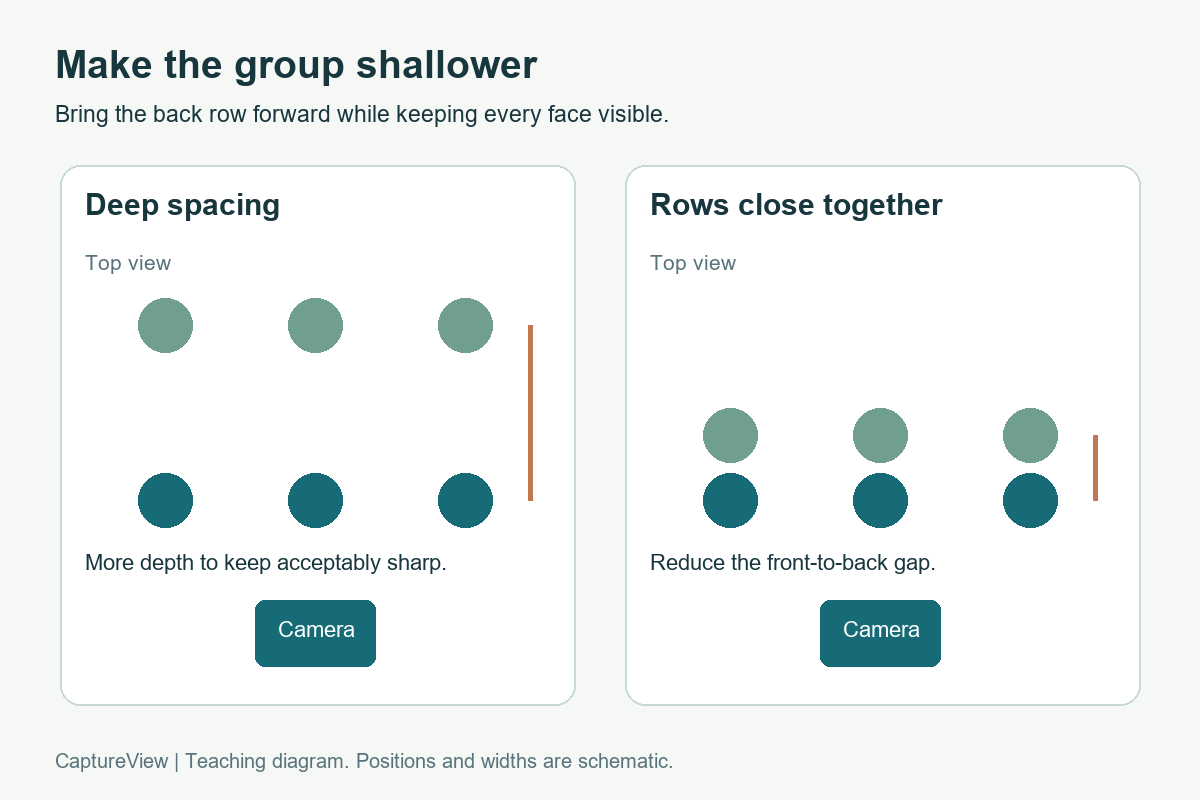
    Top view comparing widely separated rows with two rows placed close together
    A smaller front-to-back gap makes the group easier to cover with depth of field. Positions are schematic.

    Use a position where you can see every face without asking anyone to balance on an unstable step. If a person’s eyes disappear behind someone else’s head, change the arrangement. A smaller aperture cannot reveal a hidden face.

    Choose an aperture that covers the group

    A wide aperture used for a single portrait may leave too little depth for two rows. Nikon’s portrait guidance also cautions that a very wide aperture can make the sharp zone too narrow. Start with a moderate aperture and judge the result at your actual shooting distance.

    If a test at f/5.6 leaves one row soft, try f/8 while keeping the camera position steady. Check the shutter speed again after the change. In aperture priority, the camera may lengthen the exposure to compensate for the smaller opening. Auto ISO may help maintain a usable shutter speed, within the limits you set.

    In a dim room, closing the aperture repeatedly can leave you with a slow shutter or a high ISO. Bring the rows closer, find better light, or reduce the depth of the arrangement before making another adjustment. Our exposure controls lesson explains how these settings affect one another.

    Place focus deliberately and check the result

    For a shallow two-row arrangement, begin with a clearly visible eye in the front row near the middle of the group. Take a test frame and compare that eye with a face in the back row. If the rear faces are soft, reduce the gap or use a smaller aperture and test again. A deeper arrangement may require a different focus distance; no single face is the right focus target for every group.

    Eye detection can select one person reliably while the rest of the group falls outside the depth of field. Watch which eye the camera selects. If it keeps jumping to the wrong person, choose a smaller focus area or select the intended subject using the controls your camera provides.

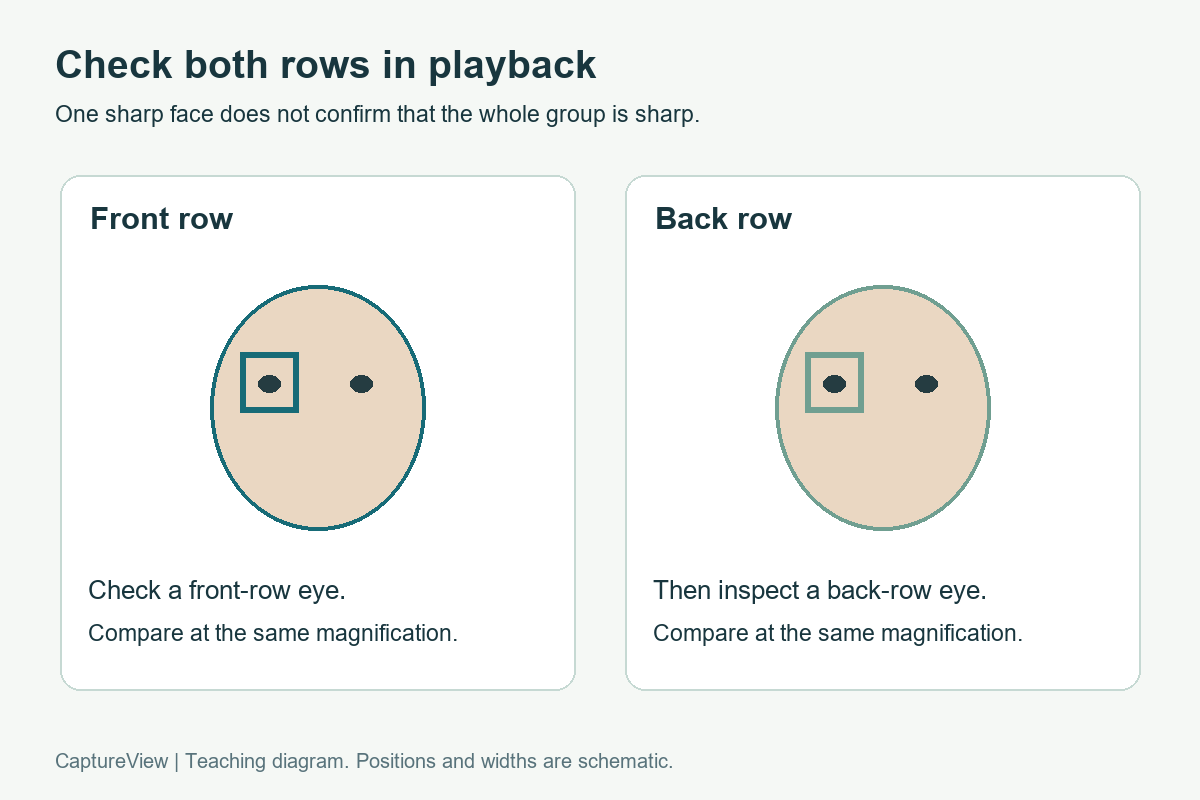
    Two playback inspection panels for checking an eye in each row
    Inspect both rows at the same magnification before accepting the photograph. This is a review diagram, not a sharpness test.

    Avoid focusing on an eye and then making a large change to your camera angle. Put the focus area over the intended eye in the finished composition. If people sway or change position, focus again before the next frame.

    Separate missed focus from movement

    Look at a stationary detail near the faces, such as a collar or the bench. If that detail is sharp but a person’s face is smeared, subject movement may be involved. When every part of the frame has a similar directional smear, investigate camera shake as well as shutter speed. An out-of-focus face usually looks soft without one clear direction of movement.

    For adults trying to hold still, 1/250 second is a reasonable first test in available light. Children, animated gestures, or a longer lens can call for a faster shutter. Raise ISO when necessary to keep the shutter speed you need. Stabilisation can reduce camera shake, but it cannot stop someone turning their head.

    A short practice session with a small group

    1. Arrange two close rows in even light and make sure every face is visible.
    2. Take a test frame at f/5.6 with a shutter speed suitable for the people in front of you.
    3. Keep the framing and focus target steady. Take another at f/8, adjusting ISO if needed to preserve shutter speed.
    4. Inspect a front-row face, a back-row face, and the faces at both edges at the same magnification.
    5. If one row remains soft, bring the rows closer and repeat. Make several final frames to give yourself a choice of expressions.

    Review before the group disperses. Check blinking eyes and hidden faces as well as sharpness. For help choosing the light, read our window-light portrait lesson. If shake is still affecting your photographs, work through the handheld sharpness exercise with a stationary subject first.

    Scene photograph: AI-generated teaching illustration. Diagrams are schematic and do not report measured camera results.

  • How to Photograph People Wearing Glasses Without Hiding Their Eyes

    How to Photograph People Wearing Glasses Without Hiding Their Eyes

    Published: Updated:

    The portrait looks relaxed, but a bright rectangle covers one eye. You ask for another smile and get exactly the same rectangle. The reflection is showing you where the window is in relation to the glasses and the camera. Repeating the expression will not change that geometry.

    Keep the glasses if the person normally wears them and wants them in the portrait. Start by moving yourself or changing the direction of the light. Aim for visible eyes and a natural expression. A small reflection away from the pupil may be acceptable.

    Find the source of the bright patch

    Before adjusting the pose, look at the reflected shape. A rectangle may be a window, a small hard spot may be a lamp, and several little rectangles may be ceiling lights. Turn off a nearby lamp when it contributes nothing useful. Do not switch off room lighting that somebody needs for safe access.

    Clean the glasses if the wearer wishes to; fingerprints can make a reflection look hazy. Let the wearer handle their own lenses and frames. Coatings, prescriptions, and lens curves vary, so two people standing in the same place may show different reflections.

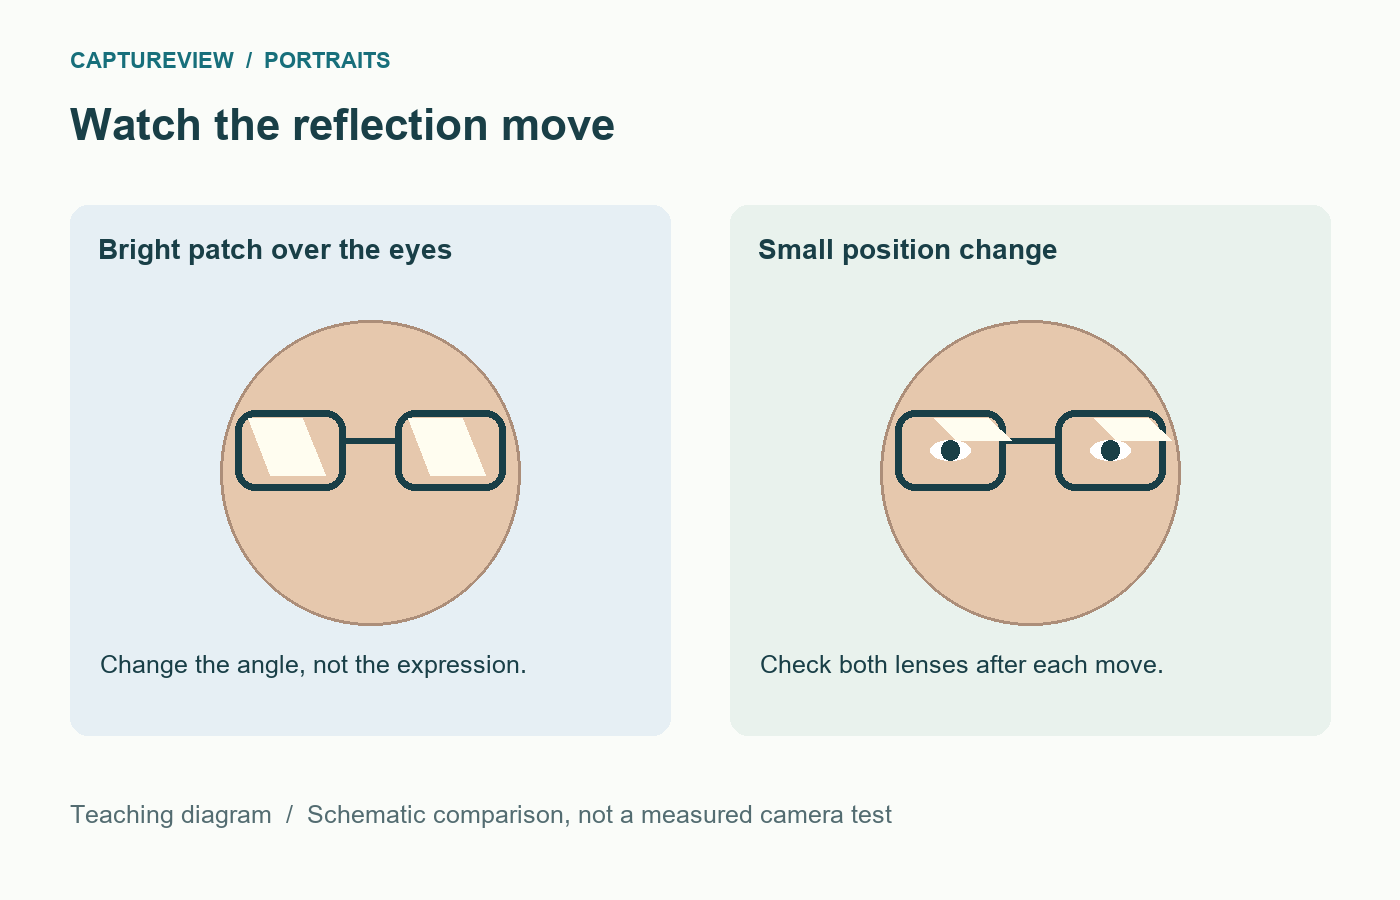
    Schematic glasses comparison showing a bright reflection over the eyes and a reflection shifted away from the pupils
    A small change in camera, face, or light position can shift a reflection. This schematic does not prescribe a universal lighting angle.

    Move one thing a small amount

    With the subject sitting comfortably, take a reference picture. Then move the camera a little left or right while keeping a similar height and distance. Watch the reflection in live view. If it moves away from the pupil, take another frame and check the expression.

    If moving yourself changes the background too much, ask for a small turn of the face towards or away from the light. Use a direction the person can follow easily: “Turn your nose a little towards the window.” Ask them to keep their gaze comfortable. Avoid twisting the head far away while insisting they stare back into the lens.

    A slight change in chin angle may help, but it can also hide the eyes behind the frame or make the pose uncomfortable. Treat it as a small adjustment, not a compulsory chin-down pose. If the wearer prefers a straight-on portrait, change the lighting position instead.

    Window-lit portrait with dark glasses and both eyes visible through the lenses
    Both eyes remain visible, with small reflections away from the pupils. Adjust the face, camera, or light position in small steps. AI-generated teaching illustration.

    Beside a window

    Start with indirect daylight from one side, rather than placing the window directly behind the photographer. Keep the person a comfortable distance from the window and turn the face gradually. Check both lenses after each useful change: clearing one eye may introduce a reflection in the other.

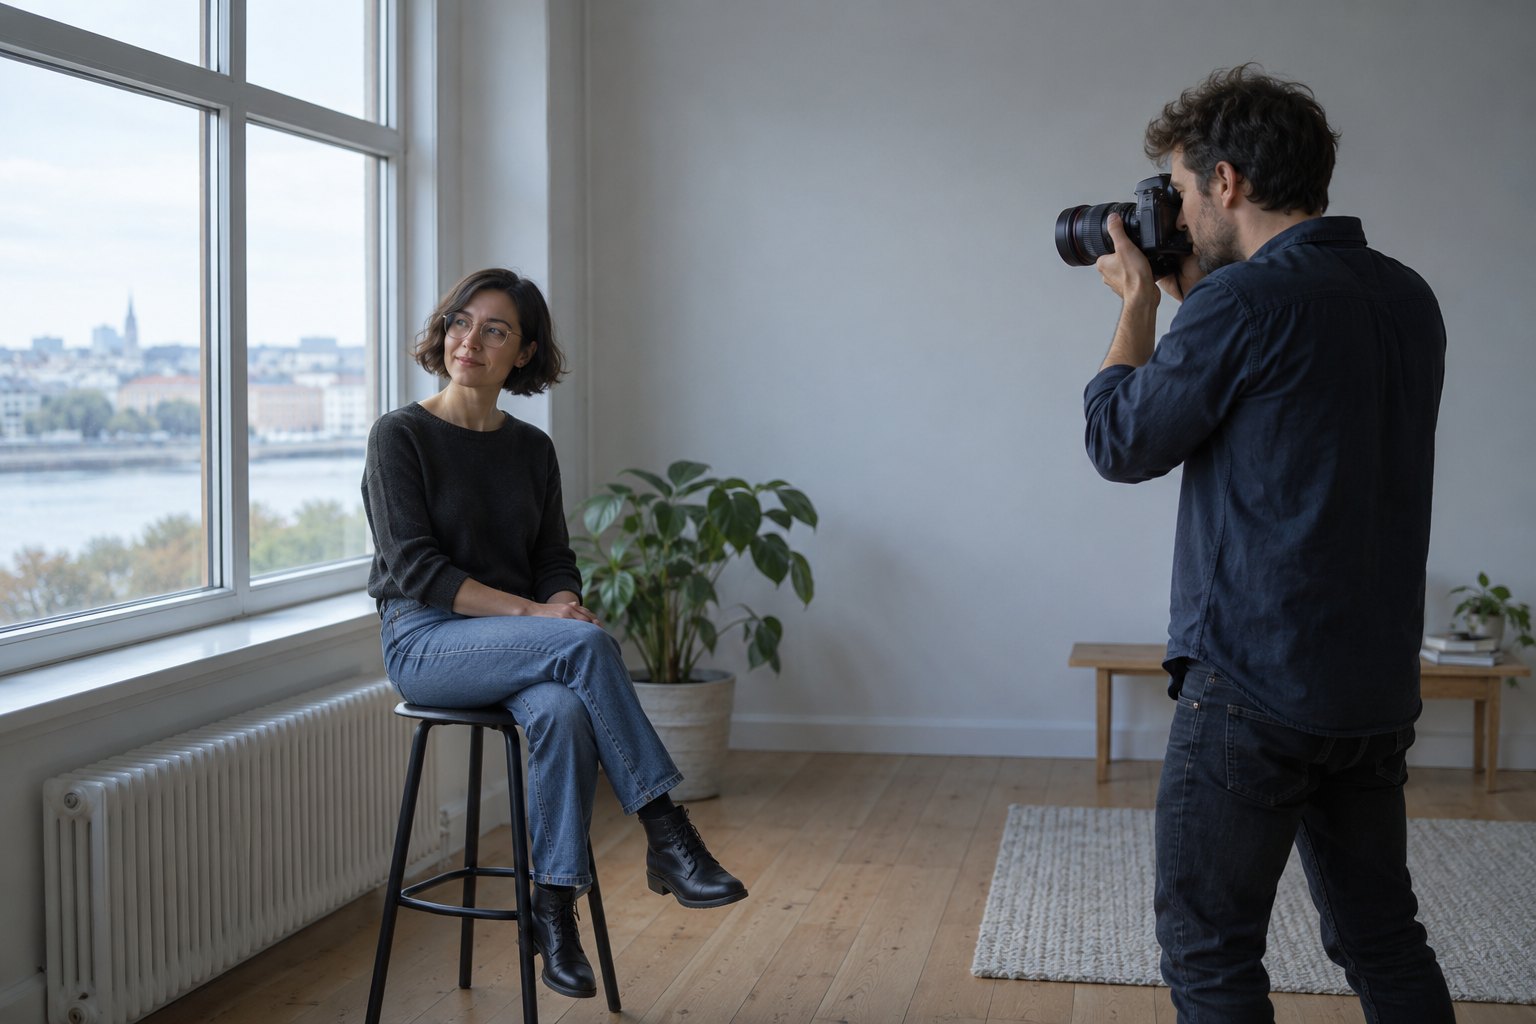
    Side view of a seated subject beside a window and a photographer in front
    Start with the window beside the subject, then make small camera or face-position changes while watching both lenses. This is a layout example, not a prescribed angle. AI-generated teaching illustration.

    A large window can produce a large reflection even though the face lighting is soft. Moving the person slightly farther into the room or changing your side of the window may move the reflected patch. Judge the resulting cheek shadows as well. Solving the glare while leaving the face too dark is not much progress.

    The setup in window-light portraits is a useful starting point. Adapt it to the glasses rather than copying a particular angle.

    Outdoors or with a movable light

    In open shade, large bright areas of sky can appear in the lenses. Try rotating the person and camera together so the brightest opening is farther to one side. Keep a simple background and watch for coloured reflections from grass or nearby walls. If the light becomes flat, use the approach in portraits in open shade to find more direction.

    Older woman wearing glasses at a shaded doorway with both eyes visible
    A sheltered doorway can provide directional soft light outdoors. Check the eyes and reflections after each change in face direction. AI-generated teaching illustration.

    With a movable lamp or softbox, shift it higher or farther to the side in small steps, using secure support. Inspect the face shadows and both lenses after every change. There is no universal height or angle that clears all prescriptions and poses. A stand outside the frame still needs enough room to be stable.

    Check the eyes, not just the absence of glare

    Magnify a test frame. Are eyelashes or the iris reasonably sharp? Did autofocus choose the glasses frame instead? Eye detection can help, but it is worth checking when lenses distort or obscure the eye. If necessary, use a smaller focus area on a visible eye.

    For a relatively still adult, 1/250 second is a useful initial handheld check in suitable light. Choose a faster speed for movement and an aperture that gives you enough depth of field. A very wide aperture is not automatically flattering if it leaves the important eye soft.

    A faint reflection near the outside of a lens may be harmless. A smaller reflection across the pupil can matter much more. Judge the location and effect rather than counting every highlight.

    A five-minute practice session

    Ask permission and explain that you will make three quick comparisons. Photograph the comfortable starting pose, then move the camera slightly to one side, then try a small face turn with the best camera position. Keep the exposure similar. Show the three frames to the person and ask which expression and lighting they prefer.

    If none works, move to a different window or shaded position. Do not spend the session adjusting the person’s frames or demanding an awkward pose. A changed location can be easier than a complicated fix.

    Do not rely on editing to reveal a hidden eye

    If glare completely replaces the pupil and iris in the file, the original eye detail may not be recoverable. Retouching can become reconstruction. Correct a small distraction cautiously, but prioritise a usable capture when you are still at the location.

    Reflection-removal tools designed for photographs taken through windows are not a guarantee for spectacles. Check the feature’s current documentation and inspect the result closely. The simplest useful edit may be choosing the next frame, where the reflection already misses the eye.

    Sources and further reading

    Adobe: Reflection Removal describes a feature intended for large reflections from shooting through glass. It is not a promise that hidden eye detail can be recovered from eyeglasses.

    u
  • How to Photograph People in Open Shade Without Flat-Looking Light

    How to Photograph People in Open Shade Without Flat-Looking Light

    Published: Updated:

    Shade removes direct sun from the face, but it does not remove the direction of light. A person deep beneath a roof may have dark eyes, while the same person near the edge of the shade receives more light from the open sky.

    Look for a bright opening

    Open shade with daylight coming from one main direction. Look for an open edge of shade, such as the side of a building, rather than treating every shaded spot as equivalent. A person can look quite different facing the open sky or the dark wall. Coloured walls and foliage nearby may reflect a tint onto the face.

    Man in the shade of a stone arch facing the bright opening
    AI-generated teaching illustration. It shows the scene discussed here, not a measured camera test.

    Find shade that opens towards light

    Look for a doorway, the side of a building, or a shaded area with a clear view towards the sky. Stand where the person will be and look around. Which direction feels brightest?

    Keep the person fully out of direct sun. Small patches of sunlight through leaves can create distracting bright spots that move across the face.

    Turn towards the bright side

    Ask the person to turn a little towards the open light. Watch the eyes and the shadow beneath the brow. Compare a frame facing into the darker area with one facing towards the opening.

    You do not need perfectly even light. A gentle difference between the cheeks can give the face shape. Make small changes and let the person settle before shooting.

    Check the background separately

    A sunlit background can be much brighter than the shaded face. If you expose for the person, the background may lose detail. If you expose for the background, the person may look too dark.

    Change your position to place a less bright area behind the subject. Moving both photographer and subject can be easier than trying to preserve every tone with one exposure.

    Watch reflected colour

    A green lawn or coloured wall can reflect light onto skin. Auto white balance may reduce an overall cast, but it cannot always correct mixed colours evenly. Move away from the strongly coloured surface and compare.

    RAW gives more flexibility for processing white balance, but improving the light at capture is still useful. See white balance basics.

    Keep the person sharp

    Shade can mean less available light. Check shutter speed and ISO rather than assuming daylight is always bright enough. Focus on the nearer eye, and increase the shutter speed if expression or movement produces blur.

    Try three face directions in the same shaded spot. Compare eye light, cheek shadows, and skin colour. Then compare with the window-light portrait lesson. In both settings, compare the light in the eyes and the shadows on the cheeks before choosing the face direction.

    For a second comparison, keep the face direction steady and move the person farther back into the doorway. Compare the light in the eyes and the shadows beneath the brow with the frame made near the opening.

    Related lessons

    Sources and further reading

    Nikon: portrait lighting.

  • Window Light Portraits: Where to Put Your Subject

    Published: Updated:

    A window can give you a useful portrait setup without flash. The first decision is where the person sits or stands. Put them beside the window, turn their face slightly towards it, and watch the shadow on the farther cheek.

    Start with indirect window light

    Indirect window light and a fairly still adult. Start with a person who can hold a comfortable position beside a window. These suggestions assume one main daylight source; a bright lamp elsewhere in the room changes the colour problem. Children, gestures, or a head turning quickly may need a faster shutter speed than the example starting point.

    Woman seated beside a window in soft natural light
    AI-generated teaching illustration. It shows the scene discussed here, not a measured camera test.

    Choose a window with manageable light

    Indirect daylight is an easy starting point. Direct sun can create a bright patch on the face and a hard-edged shadow. If that is not the look you want, move away from the patch, use a sheer curtain if available, or choose another time.

    Turn off nearby lamps if they add orange or green light. Mixed lighting is difficult to correct evenly because different parts of the face can have different colours.

    Start beside the window

    Place the person with one shoulder nearer the window. Ask them to turn towards the light a little at a time. Watch the eyes and both cheeks. A small turn can change the portrait more than moving several metres.

    Moving farther into the room usually reduces the available light. It can also change the contrast, depending on the room and window. Judge the face rather than following a fixed distance.

    Make the background a separate decision

    Look behind the person before taking a frame. A plain wall, curtain, or quiet room corner can work. Leave space between the person and the background when the room allows it.

    Do not make the subject uncomfortable just to obtain blur. A relaxed person in a slightly detailed setting can be a stronger portrait than a stiff pose against an empty background.

    Focus and exposure

    Use the nearer eye as your focus target, or reliable eye-detection autofocus. Start around 1/250 second for a fairly still adult, then adjust after checking movement and camera shake. Animated expressions and children may need faster speeds.

    A wide aperture can soften the background, but the widest setting is not always useful. If one eye is soft or focus is inconsistent, try a narrower aperture and check again. Raise ISO when necessary to keep a suitable shutter speed.

    Soften the darker side if needed

    A white wall or reflector can return some light to the shadow side. Bring it closer for a stronger effect, then compare. You do not have to remove every shadow; shadows help describe the face.

    Keep the directions small

    Ask permission before photographing. Explain one change at a time: turn towards the window, relax a shoulder, or look just beside the camera. Give the person time to settle before pressing the shutter.

    Make three frames with slightly different face directions, keeping the camera and background steady. Compare cheek shadows, eye light, and expression. Ask the person which feels most like them.

    For troubleshooting, read focus and sharpness and the portrait practice lesson.

    Keep the camera and background steady as the person turns towards and away from the window. Compare the shadow under the nose as well as both eyes. If increasing exposure washes out a cheek, adjust the light direction or shadow fill first.

    Related lessons

    Sources and further reading

    Nikon: portrait lighting and exposure.

© 2026 CaptureView. All rights reserved.