Author: admin

  • How to Use Exposure Compensation When Your Camera Gets Brightness Wrong

    Published: Updated:

    You photograph a white wall in daylight, and the camera makes it look grey. Or you photograph a dark jacket, and the image comes back brighter than the scene felt. The meter has estimated an exposure from the light it sees. That estimate may need a small correction, and exposure compensation gives you a quick way to make one when the camera is choosing exposure for you.

    The control is usually marked with a plus and minus symbol. Positive values ask for a brighter result; negative values ask for a darker one. The adjustment is measured in exposure values, often called stops. A one-stop change is substantial, so make a small move first and check the result. Button names and behaviour vary across cameras, so use your manual to locate the control and learn how your model displays its setting.

    Check your exposure mode first

    A camera mode that is choosing part of the exposure. The examples assume the camera is metering the scene and can change a setting in response to compensation. Before comparing frames, check which values actually moved and whether a shutter-speed, aperture, or Auto ISO limit was reached. Fully manual exposure with fixed ISO may behave differently; consult your camera manual.

    White bowl and folded linen with visible highlight texture
    AI-generated teaching illustration. It shows the scene discussed here, not a measured camera test.

    Why the meter can look wrong

    A reflective meter measures light coming back from the scene. It does not know that the large bright area is snow, a white wall, or a pale dress. It also does not know that a dark coat should remain dark. Depending on framing and metering pattern, the camera may steer these scenes towards a middle brightness. The result can look different from what you saw.

    The meter has not necessarily malfunctioned. It is making an estimate from reflected light, and some subjects do not fit the assumptions behind that estimate. Exposure compensation lets you adjust the camera’s target without switching out of a mode such as aperture priority or shutter priority.

    Start with a white or bright subject

    Try a white bowl or sheet of paper in steady daylight. Frame it so it occupies a good part of the view, set aperture priority, and take a photograph at zero compensation. Check whether the surface looks grey and whether its texture is visible. If it is too dark, try a modest positive adjustment, such as +0.7 EV, and take another frame.

    Compare both photographs on the camera screen or a computer. Look at the brightest textured area. If it has become featureless white, the adjustment may have gone too far. Reduce it until the surface looks bright while retaining the detail you care about. A small reflection can clip without harming the image, but broad areas of lost texture may matter.

    Snow can be another useful practice subject, but it is not a reason to apply the same fixed value every time. Light, background, and metering pattern change the result. Make a test exposure, inspect it, and adjust based on the actual photograph.

    Try negative compensation with a dark scene

    Place a dark coat or object against a neutral background and make a frame at zero. If the camera has lifted the scene until the dark subject looks washed out, try a small negative adjustment. Watch whether the material still shows texture. The aim is not always to make the image darker; it is to bring the rendered brightness closer to the photograph you intend.

    Backlit subjects require another kind of judgement. A face in front of a bright window may appear too dark if the camera gives weight to the window. Positive compensation can brighten the face, though the window may lose detail. If both areas matter, consider changing the light or position, using fill light, or making multiple frames for later blending when appropriate.

    Know what the camera changes

    In aperture priority, the camera often changes shutter speed when you dial compensation. If Auto ISO is active, ISO may change too. In shutter priority, aperture or ISO may move. In a program mode, the camera can adjust more than one setting. Compensation changes the target exposure, but it does not guarantee a particular shutter, aperture, or ISO.

    Watch the values in the viewfinder or playback information. If positive compensation makes the shutter slower, a moving subject may blur. If it opens the aperture, the background may become less sharp. If ISO rises, image noise can become more visible. These effects depend on the camera’s settings and limits.

    In manual exposure with a fixed ISO, the meter may show that your selected settings are brighter or darker than its reference without changing the captured exposure. Some cameras allow exposure compensation to affect Auto ISO in manual mode. Behaviour differs across models. Check the meter scale and the manual instead of assuming the control works the same way in every mode.

    Use the histogram and highlight warning carefully

    The playback image is a useful first check, but screen brightness can make it misleading. A histogram shows how tones are distributed in the rendered preview. It can help you notice a strong shift towards the right or left, but it does not tell you whether the composition works or whether a particular highlight is important.

    Highlight blinkies, when available, show areas that may be clipped in the preview. The preview can be based on a JPEG rendering even when you shoot RAW. Treat it as a warning to inspect, not a perfect reading of every channel in the RAW file. Protect the details that matter in your photograph rather than trying to make a histogram look evenly centred.

    Exposure compensation is not a focus control

    If the subject is soft, changing compensation may only make a blurry image brighter or darker. Check where focus landed, whether the shutter speed was suitable for movement, and whether the camera moved during the exposure. If the image is sharp but the brightness is off, then compensation may be the right adjustment.

    When the camera chooses a shutter speed, a compensation change can affect motion. A brightening adjustment might slow the shutter, depending on mode and available settings. Recheck speed for people, pets, and handheld telephoto shots. For mode-specific guidance, see Aperture Priority: What to Check Before You Press the Shutter.

    A repeatable three-frame exercise

    Choose a still subject with a bright or dark area that you want to render carefully. Keep the light and framing steady. Take one frame at zero, one at a small positive value, and one at a small negative value. For example, compare 0, +0.7, and −0.7 EV. Avoid large changes until you see how the camera behaves.

    For each frame, note shutter speed, aperture, and ISO. Then compare the subject’s brightness and its texture. This separates the visual change from the camera’s method of making that change. Repeat with a backlit face, white object, and dark object. You may find that each scene needs a different correction, or no correction at all.

    Remember to reset it

    Exposure compensation often remains active after you take a picture. A positive setting that helped a backlit portrait can make the next evenly lit scene too bright. A negative setting used for a bright reflection can unexpectedly darken a person indoors. Check the compensation indicator when the exposure looks surprising, and return it to zero when you no longer need the adjustment.

    Some cameras reset compensation when switched off; others retain it. Do not rely on memory or assume a universal behaviour. Add the indicator to your regular pre-shot check, especially when changing from one type of scene to another.

    When compensation is not enough

    If the subject and background differ greatly in brightness, a single exposure may not preserve detail in both. You could change your angle, wait for more even light, use a reflector or fill light, or expose for the part of the scene that matters most. A graduated neutral density filter or careful multiple exposure workflow may help in some landscape situations, but each has trade-offs.

    Use the simplest option that fits the photograph. Compensation is most useful when the camera is already close and needs a small nudge. If you repeatedly need a large adjustment, review the metering mode, exposure mode, light, and composition. A change in viewpoint can sometimes solve the problem more cleanly than a larger correction.

    Related lessons

    Sources and further reading

    Nikon D850 manual: exposure compensation (model-specific example).

  • How to Edit a Photo Without Making It Look Overprocessed

    Published: Updated:

    The sky is electric blue, the grass is almost fluorescent, and every edge has a bright outline. Each slider may have looked better on its own. Together, the changes have pushed the photograph further than you intended.

    Set up a fair comparison

    One original file and a consistent viewing setup. Keep an untouched original and compare versions at the same size and brightness. A screen with an unusually vivid colour mode can make a restrained edit look more saturated than it is. The exercise is about judging this photograph, not finding one preset that suits every subject.

    Pear and white linen in restrained natural window light
    AI-generated teaching illustration. It shows the scene discussed here, not a measured camera test.

    Start again with two specific problems to solve. Perhaps the face is dark and the horizon tilts. Fix those before adding a preset.

    Keep an untouched original

    Use editing software that preserves the original, or work on a copy. Keep the full-resolution file. Save a separate export for sharing so you can return to the photograph later without relying on a compressed copy.

    Set the frame before fine adjustments

    Check the horizon and edges. A small crop may remove a distraction, but a tight crop can also lose the setting that explains the subject. Compare at the same viewing size.

    Leave enough space around hands, feet, and faces when it suits the composition. Watch whether straightening has cut something important from a corner.

    Adjust brightness with a subject in mind

    Look at the area you want the viewer to notice. Increase overall exposure only if the whole image needs it. If the face is dark but the sky already looks bright, a selective adjustment may be more suitable than brightening everything.

    Do not force every shadow to show equal detail. Shadows can give a scene shape. Check highlight warnings when available, but remember that a reflection or light source may legitimately be very bright.

    Choose colour before adding saturation

    If a white wall looks blue or a face looks orange, inspect white balance first. Increasing saturation makes a colour cast stronger.

    Use a neutral object as a reference when appropriate, while remembering that warm evening light may be part of the scene. Mixed light can require local adjustments because one global setting cannot correct every area equally.

    Check texture at a useful size

    Sharpening can help edges look clearer, but too much produces halos and brittle detail. Noise reduction can smooth grain while also smoothing fine texture. Inspect a detailed area at high magnification, then return to normal viewing size.

    Do not judge the whole edit at an extreme zoom level. The photograph needs to work at the size where people will see it.

    Use the original as a regular comparison

    Toggle between the edit and original after a few changes. If everything became brighter, more colourful, and more contrasty, ask which of those changes actually helped the subject.

    Take a short break. Your eyes adapt to strong colour and contrast, so an edit can look restrained while you work and excessive when you return.

    Export and inspect the exported file

    For ordinary web sharing, JPEG in sRGB is a practical choice. Use dimensions suited to the destination, inspect detail after resizing, and avoid repeatedly overwriting the only JPEG copy.

    Make a small edit of one photograph and write down the two problems you solved. Reduce any adjustment you cannot explain, then compare the versions at normal viewing size.

    Continue with the editing lesson and RAW, JPEG, and white balance.

    For this practice, choose a file with a neutral surface and a coloured subject. Compare brightness and white balance before adding local contrast. If colour changes between the editor and the exported file, check the export colour space and viewing application before adding saturation.

    Related lessons

    Sources and further reading

    Adobe: Camera Raw adjustments.

  • Why Is Your Moving Subject Blurry When the Background Is Sharp?

    Published: Updated:

    The pavement is sharp, but the cyclist is a streak. That is a useful clue: the camera probably stayed steady enough to record the background, while the subject moved during the exposure.

    Check the movement in the frame

    A moving subject and a reasonably steady camera. The diagnostic steps are easiest when you can compare several frames of the same movement. A cyclist passing across the frame is a different case from someone walking towards you: both speed and direction affect the result. Check the recorded shutter speed and the intended focus target before blaming the lens.

    Runner crossing a park path with movement in the feet
    AI-generated teaching illustration. It shows the scene discussed here, not a measured camera test.

    Before changing autofocus settings, check the shutter speed recorded with the photograph.

    Separate subject movement from missed focus

    Motion blur often has a direction. A hand, wheel, or person stretches along its movement. Missed focus more often looks like soft edges without a clear streak, while another distance in the scene may look sharp.

    These are clues, not perfect diagnoses. Focus error and movement can happen in the same frame. Magnify the subject and a stationary background detail before choosing a fix.

    Use a faster shutter for a still-looking subject

    Try shutter priority, labelled S or Tv on many cameras. A walking person might be a useful test at around 1/500 second; faster action can need 1/1000 or more. Compare the result rather than treating those numbers as guarantees.

    Movement across the frame can show more blur than movement towards the camera. Distance, focal length, and final display size also affect how much movement you notice.

    Watch what exposure has to give up

    A faster shutter records light for less time. The camera may open the aperture or raise Auto ISO to compensate. In dim light, the lens can reach its widest aperture and the photograph may still be too dark.

    Check the display for exposure warnings. Add light, increase ISO, or choose a slower speed if some blur is acceptable. A sharp subject with visible noise can be preferable to a clean file with unwanted motion blur.

    Use continuous autofocus for changing distance

    If the subject moves towards or away from you, continuous autofocus can help keep the focus distance updated. Names include AF-C and AI Servo. Choose a suitable focus area and keep it on the subject.

    Check focus and shutter speed separately: a faster exposure cannot correct focus on the background, and continuous autofocus cannot freeze the subject during the exposure.

    What stabilisation can and cannot do

    Image stabilisation reduces the effect of camera movement in suitable conditions. It cannot keep a moving person still during a long exposure. That is why a background can look sharp while a hand is blurred, even with stabilisation enabled.

    When blur belongs in the photograph

    For a sense of speed, you may want a blurred background and a recognisable subject. Panning follows the subject during exposure. Start with a manageable subject in a safe place, turn smoothly, and compare several shutter speeds. Expect an uneven success rate while learning.

    For ordinary practice, take a faster-shutter version first so you have a comparison. Then decide whether blur adds something.

    Read focus and sharpness and camera modes for the next adjustments.

    Related lessons

    Sources and further reading

    Nikon: photographing movement.

  • Where Should You Focus in a Landscape?

    Published: Updated:

    A landscape can contain rocks a metre from the camera and hills kilometres away. Focusing on the hills does not guarantee sharp foreground rocks. Focusing on the nearest rock does not guarantee sharp hills either.

    Choose a scene you can compare

    A static landscape with detail at different distances. This lesson assumes the camera position is stable and the scene has near and distant details to inspect. Compare the original files at the same magnification, not differently cropped previews. Moving foliage, water, and wind can introduce blur even when your focus choice is sensible.

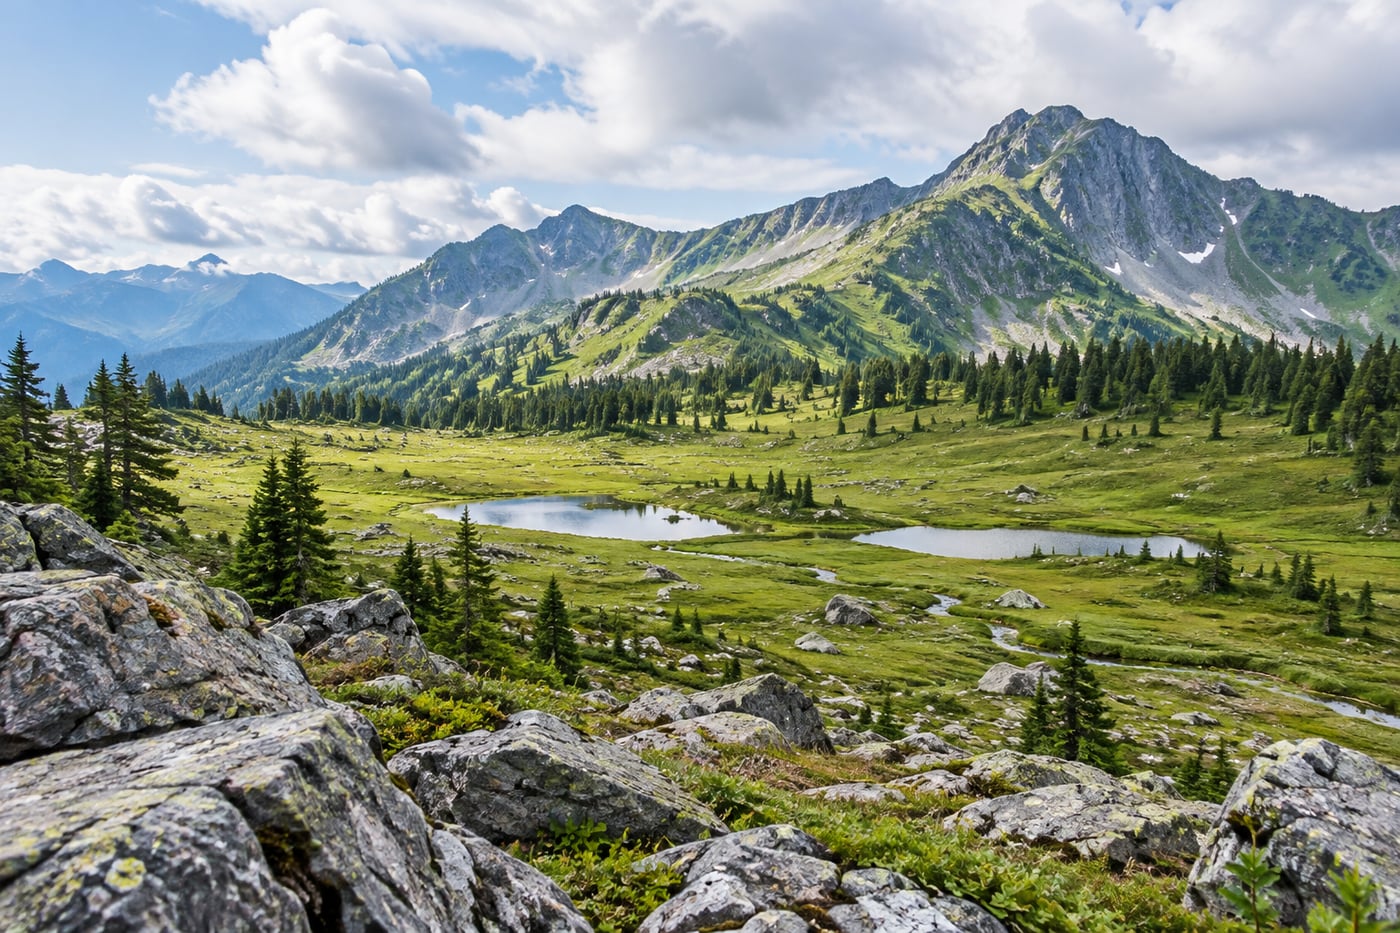
    Foreground rocks and a distant ridge across an alpine meadow
    AI-generated teaching illustration. It shows the scene discussed here, not a measured camera test.

    Choose the details that matter, then check whether your settings keep them sharp enough for the final photograph.

    Start with the distances in your frame

    A scene without a very close foreground is usually easier to manage. At a moderate aperture, focusing on an important middle-distance feature may give a useful result. A close flower or rock changes the problem because it demands more depth of field.

    There is no universal “focus one third into the frame” rule. A third of the picture’s height is not a measurement of subject distance, and two scenes with similar framing can have very different distances.

    Use a moderate aperture first

    On many cameras, f/8 is a reasonable starting point for a broad daylight scene. It is not a guarantee. Make a frame, then magnify a near detail and a distant detail in playback.

    If the important areas are not sharp enough, try a narrower aperture and repeat the comparison. Very small apertures can reduce fine detail through diffraction. Whether the trade-off is worthwhile depends on the camera, output size, and scene.

    Change the frame when depth of field is insufficient

    Sometimes the easiest fix is to move the camera farther from the foreground or remove the closest object from the composition. This reduces the distance range you need to cover.

    Before considering a complicated technique, ask whether that foreground object improves the photograph. A sharp object at the bottom of the frame is not useful merely because it is close.

    Keep movement separate from focus

    A tripod steadies the camera. It does not stop wind-blown leaves or flowing water. If those details need to look still, choose a faster shutter and raise ISO if required.

    For still scenes with a long exposure, use stable support and a timer or remote release. Check your manual for stabilisation behaviour on a tripod.

    When focus stacking may help

    For a stationary scene, several frames focused at different distances can be combined in compatible software. This is called focus stacking. It takes more care than a single frame: camera position and exposure should remain consistent, and moving plants or water can create blending problems.

    Inspect a single frame before deciding whether the scene needs stacking.

    A field check you can repeat

    1. Identify the nearest and farthest details you want sharp.
    2. Choose a moderate aperture and an initial focus distance.
    3. Make a frame and magnify both areas.
    4. Adjust focus, aperture, or composition, then compare again.

    See depth of field basics and the landscape practice lesson for the related controls.

    If only the foliage is soft, check for wind movement. Compare a moderate aperture if a very small one makes the whole frame softer. In a stacked file, inspect moving water and leaves for blending errors, even when the individual frames look plausible.

    Related lessons

    Sources and further reading

    Nikon: aperture and depth of field.

  • Window Light Portraits: Where to Put Your Subject

    Published: Updated:

    A window can give you a useful portrait setup without flash. The first decision is where the person sits or stands. Put them beside the window, turn their face slightly towards it, and watch the shadow on the farther cheek.

    Start with indirect window light

    Indirect window light and a fairly still adult. Start with a person who can hold a comfortable position beside a window. These suggestions assume one main daylight source; a bright lamp elsewhere in the room changes the colour problem. Children, gestures, or a head turning quickly may need a faster shutter speed than the example starting point.

    Woman seated beside a window in soft natural light
    AI-generated teaching illustration. It shows the scene discussed here, not a measured camera test.

    Choose a window with manageable light

    Indirect daylight is an easy starting point. Direct sun can create a bright patch on the face and a hard-edged shadow. If that is not the look you want, move away from the patch, use a sheer curtain if available, or choose another time.

    Turn off nearby lamps if they add orange or green light. Mixed lighting is difficult to correct evenly because different parts of the face can have different colours.

    Start beside the window

    Place the person with one shoulder nearer the window. Ask them to turn towards the light a little at a time. Watch the eyes and both cheeks. A small turn can change the portrait more than moving several metres.

    Moving farther into the room usually reduces the available light. It can also change the contrast, depending on the room and window. Judge the face rather than following a fixed distance.

    Make the background a separate decision

    Look behind the person before taking a frame. A plain wall, curtain, or quiet room corner can work. Leave space between the person and the background when the room allows it.

    Do not make the subject uncomfortable just to obtain blur. A relaxed person in a slightly detailed setting can be a stronger portrait than a stiff pose against an empty background.

    Focus and exposure

    Use the nearer eye as your focus target, or reliable eye-detection autofocus. Start around 1/250 second for a fairly still adult, then adjust after checking movement and camera shake. Animated expressions and children may need faster speeds.

    A wide aperture can soften the background, but the widest setting is not always useful. If one eye is soft or focus is inconsistent, try a narrower aperture and check again. Raise ISO when necessary to keep a suitable shutter speed.

    Soften the darker side if needed

    A white wall or reflector can return some light to the shadow side. Bring it closer for a stronger effect, then compare. You do not have to remove every shadow; shadows help describe the face.

    Keep the directions small

    Ask permission before photographing. Explain one change at a time: turn towards the window, relax a shoulder, or look just beside the camera. Give the person time to settle before pressing the shutter.

    Make three frames with slightly different face directions, keeping the camera and background steady. Compare cheek shadows, eye light, and expression. Ask the person which feels most like them.

    For troubleshooting, read focus and sharpness and the portrait practice lesson.

    Keep the camera and background steady as the person turns towards and away from the window. Compare the shadow under the nose as well as both eyes. If increasing exposure washes out a cheek, adjust the light direction or shadow fill first.

    Related lessons

    Sources and further reading

    Nikon: portrait lighting and exposure.

  • How to Simplify a Busy Background Before You Take the Photo

    Published: Updated:

    A person stands in front of a row of shops. The expression is good, but a bright sign and a bin compete with the face. Before changing aperture or reaching for an editing tool, move a step sideways. A different viewpoint may solve the problem immediately.

    Before changing your viewpoint

    A still subject with room to move. This exercise assumes you can change your viewpoint without stepping into traffic or leaving a permitted area. Keep the subject and light reasonably steady so you can compare the background rather than a change in expression or exposure. For a moving subject, check the frame edges in advance and wait for it to enter the clearer space.

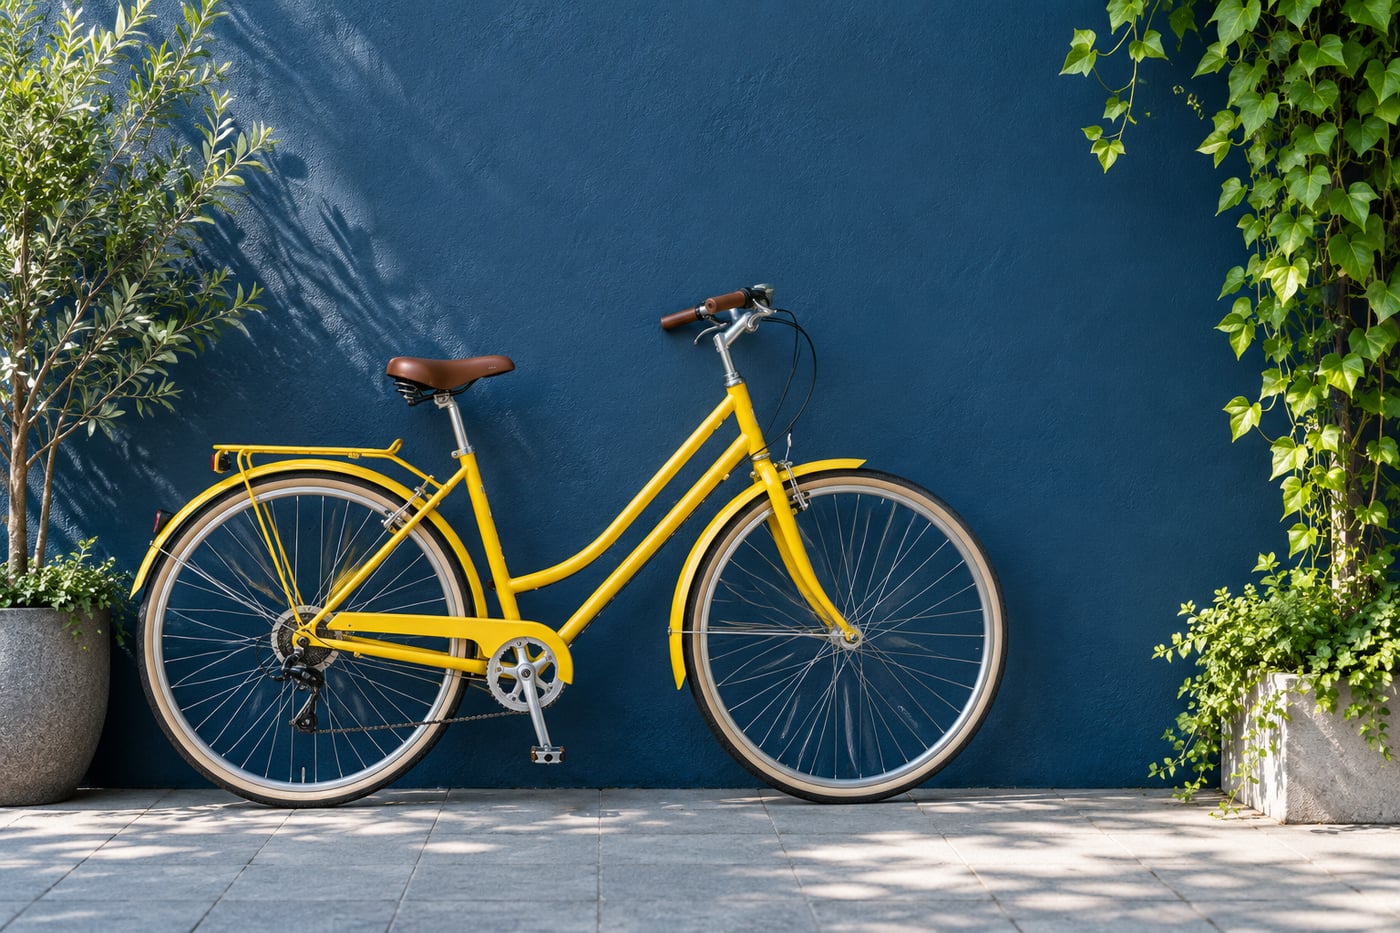
    Yellow bicycle against a quiet blue wall with plants at the edges
    AI-generated teaching illustration. It shows the scene discussed here, not a measured camera test.

    Decide what belongs in the photograph

    Name the subject in a few words. Then ask which background details help explain it. A baker’s shelves might belong in a portrait of a baker. A bright parked car behind a flower probably does not.

    Keep background details that explain the subject. If a sign, pole, or bright patch competes with it, change your position or framing and compare the result.

    Check behind the subject, then check the edges

    Look for poles, branches, or lines that appear to grow out of a head. Find bright patches that pull attention away. Finally, scan the four edges for half-visible objects and accidental cuts.

    This check is easier before shooting than after. Keep the camera ready, but pause long enough to look at the whole frame.

    Try these changes in order

    1. Move sideways. Watch how near and far objects overlap. A small shift may place the subject against a quieter area.
    2. Change height. Lowering the camera can replace a cluttered ground background with sky. Raising it can hide a distracting object behind the subject.
    3. Tighten the frame. Move closer when safe, or zoom. Keep enough context to explain the scene.
    4. Move the subject. For a cooperative portrait, ask the person to step towards a simpler wall or a darker patch of foliage.

    Use blur after improving the position

    A wider aperture can soften the background, particularly when the subject is separated from it. But a blurred bright sign can still be distracting. Blur also reduces the range that looks sharp, so accurate focus becomes more important.

    For the trade-off, see aperture and depth of field. If you are photographing someone, keep the important eye sharp and review the frame at high magnification.

    When a busy background is useful

    A market, workshop, or family kitchen can tell a story through its detail. Instead of removing everything, try placing the subject against a patch with less contrast. Wait for an overlap to clear. Let the setting stay visible without allowing the loudest object to dominate.

    A five-frame exercise

    Choose a still subject and make five frames: your first position, one step left, one step right, a lower viewpoint, and a tighter frame. Keep exposure similar where possible. Compare them at the same display size.

    Compare how easily you notice the subject and how much useful context remains. Keep part of the shopfront if it helps explain the portrait.

    Continue with the composition and light lesson.

    If the frame becomes cramped, return to a wider view and wait for an overlap to clear. If the eye is soft at a wide aperture, narrow it slightly and recheck focus.

    Related lessons

    Sources and further reading

    Adobe: changing viewpoint.

© 2026 CaptureView. All rights reserved.